How to Get Started with Test Management in ZENETICS
This short guide will help you set up your account and create the first Test Suite in ZENETICS. The process is simple and will get you up and running with a first sample application in less then 10 minutes.
Here is a basic overview of the main concept in ZENETICS, with everything you need to know to get started::
- Application: Represent your AI use cases and help you to manage a portfolio of different AI applications independently.
- Test Case: Represent the input (and optionally the expected output) that defines the specific test case for your AI application. Test Cases are grouped in Folders to keep your test cases organized.
- Test Suite: Groups Test Cases and assigns them to specific Evaluators to analyze the output generated by your AI application. You can e.g. create separate Test Suites for different aspects of your application (like security) or for different stages of your development process.
- Evaluator: Analyze the output generated by your AI application and provide feedback on the quality and reliability of the output.
- Test Run: Represents the results of a Test Suite run by the ZENETICS SDK. Test Runs provide detailed information about the output generated by your AI application and the feedback provided by the Evaluators.
If you don't have an account yet, you can request a ZENETICS Product Demo or join our Waiting List for the Pilot Program. To request a demo, book your personal demo with our team at zenetics.io (opens in a new tab). To join our Free Trial, please reach out to us at: sales@zenetics.io
Log Into Your ZENETICS Account
Log into your ZENETICS account: ZENETICS Login (opens in a new tab)
If you don't have an account yet, reach out to our team to help you get started with your Free 3 Month Trial: ZENETICS Sales Team (opens in a new tab)
Create an Application
Applications allow you to manage different AI use cases independently. To create a new application, click on the Create Application button on the applications overview page.
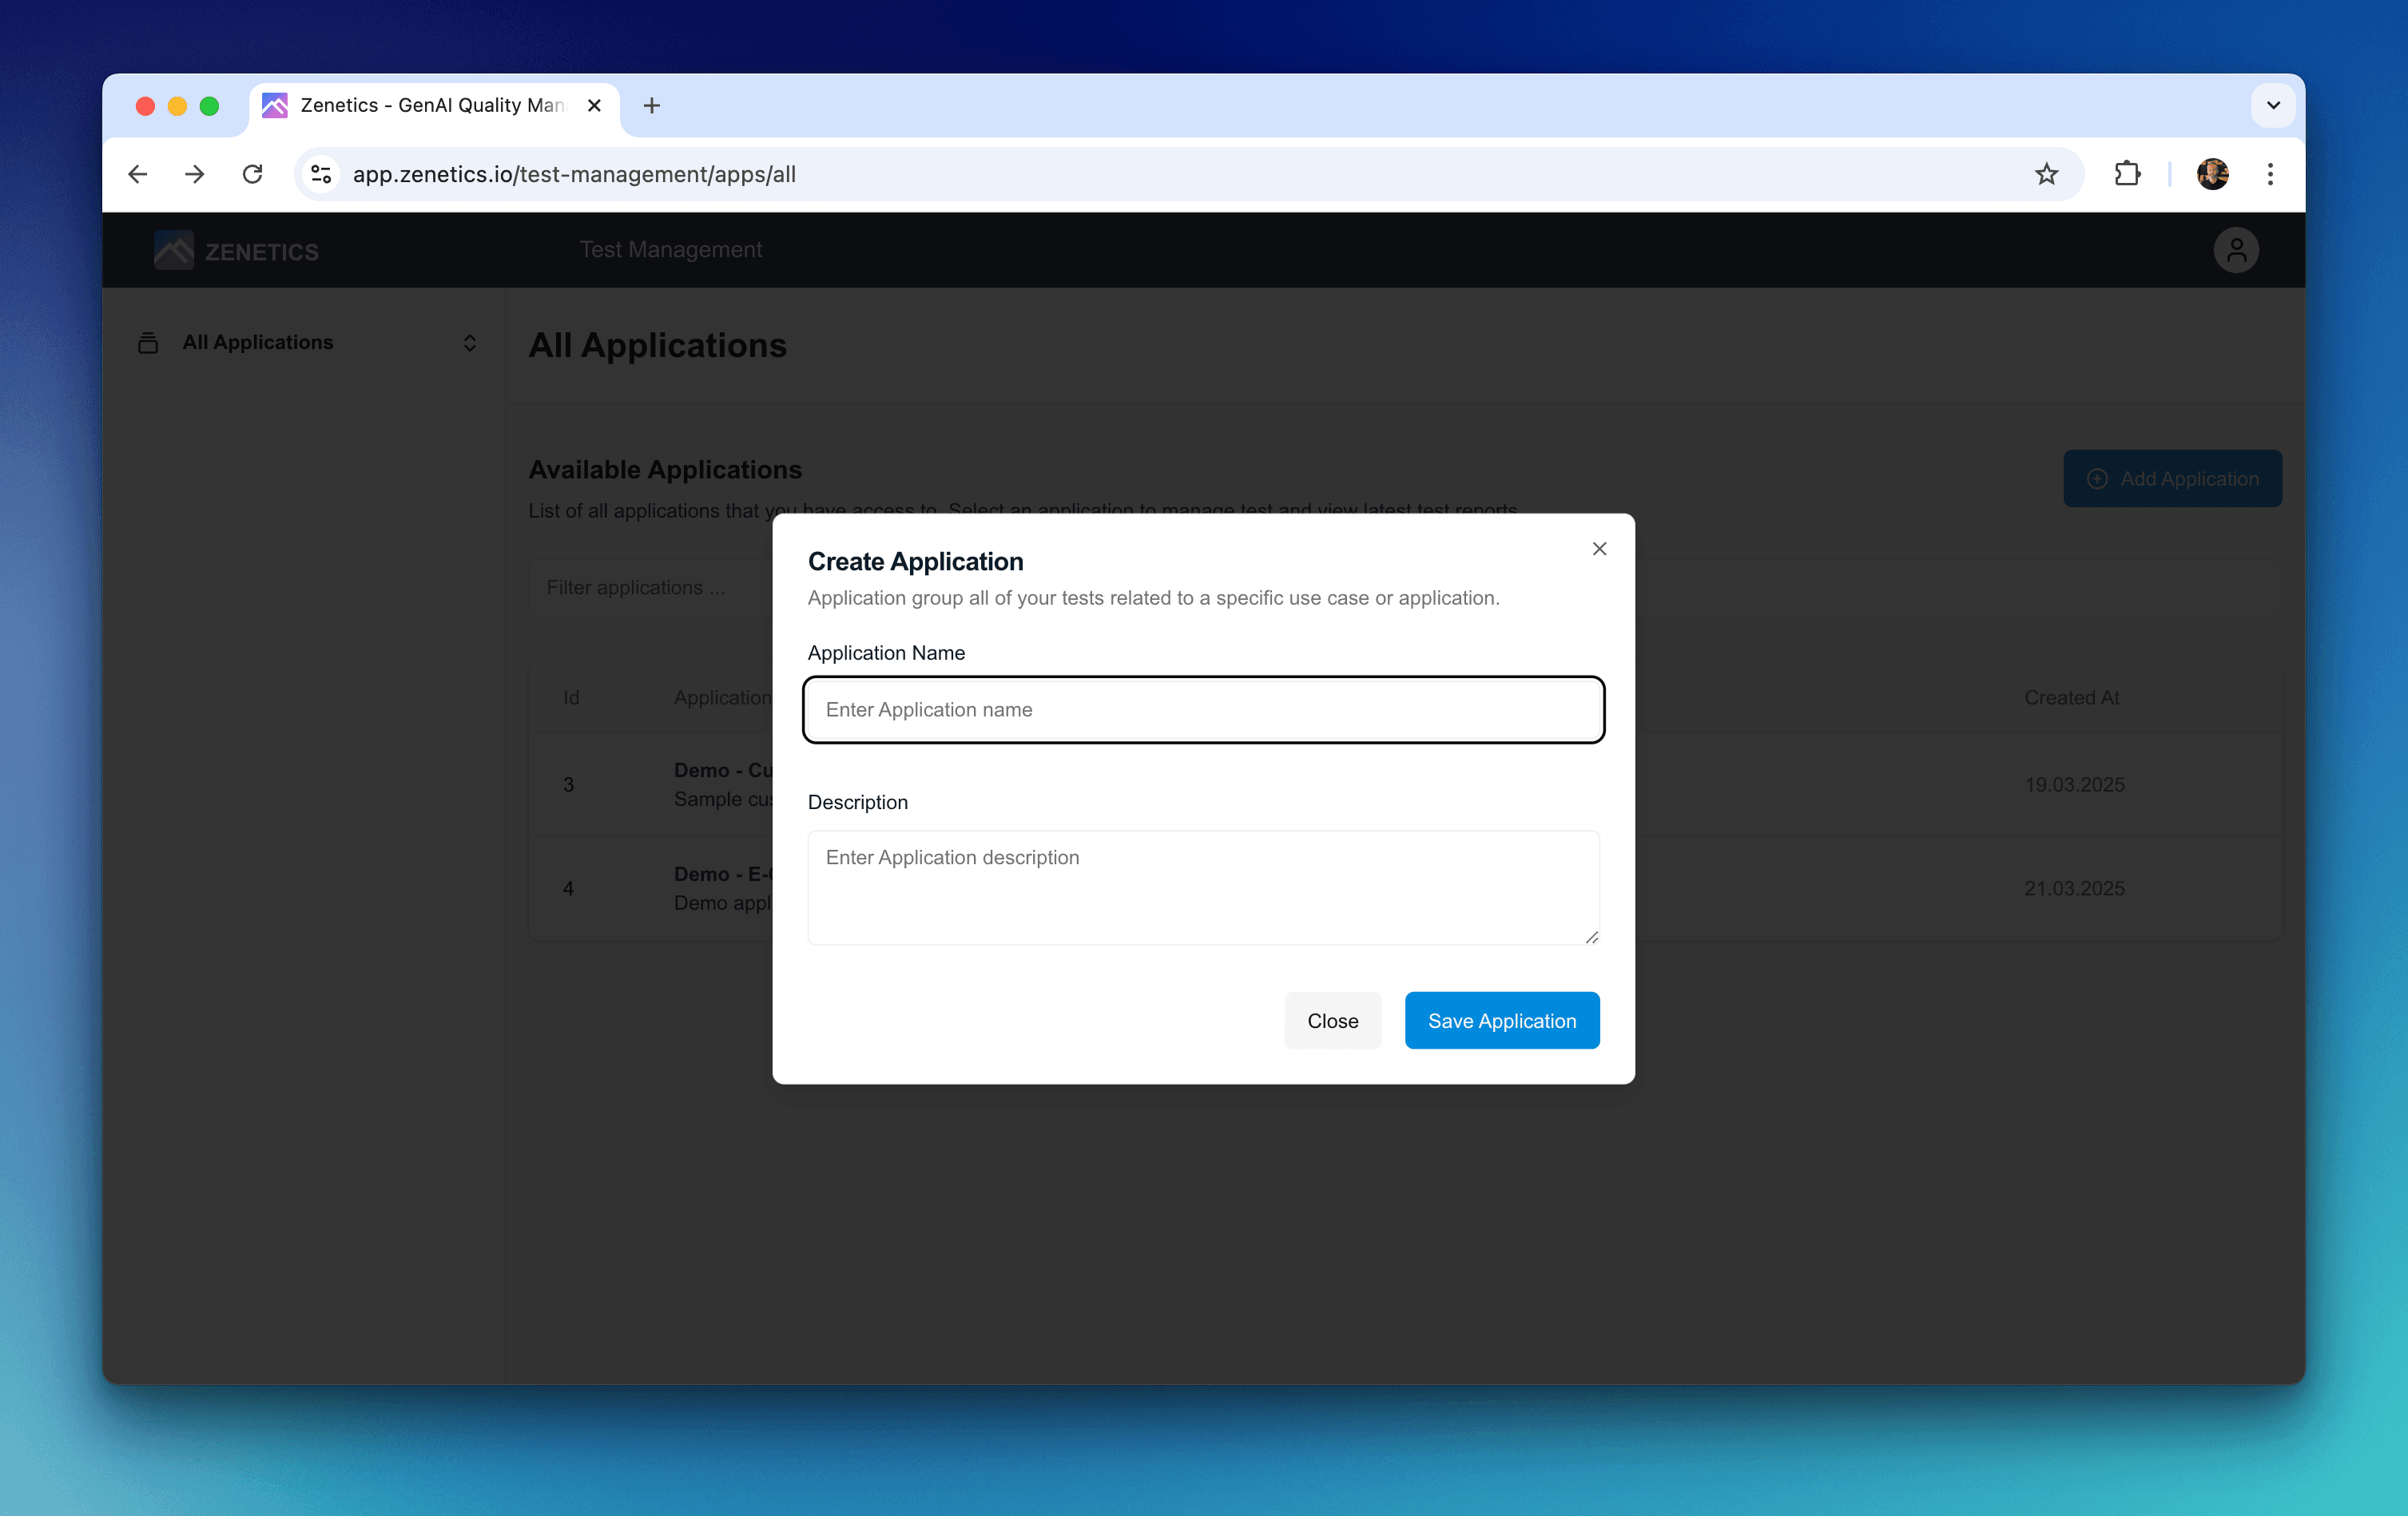
Your account comes with a demo application that helps you get familiar with the key concepts of ZENETICS. We recommend to create a new application for your first project to keep the demo application clean.
Create a First Test Case
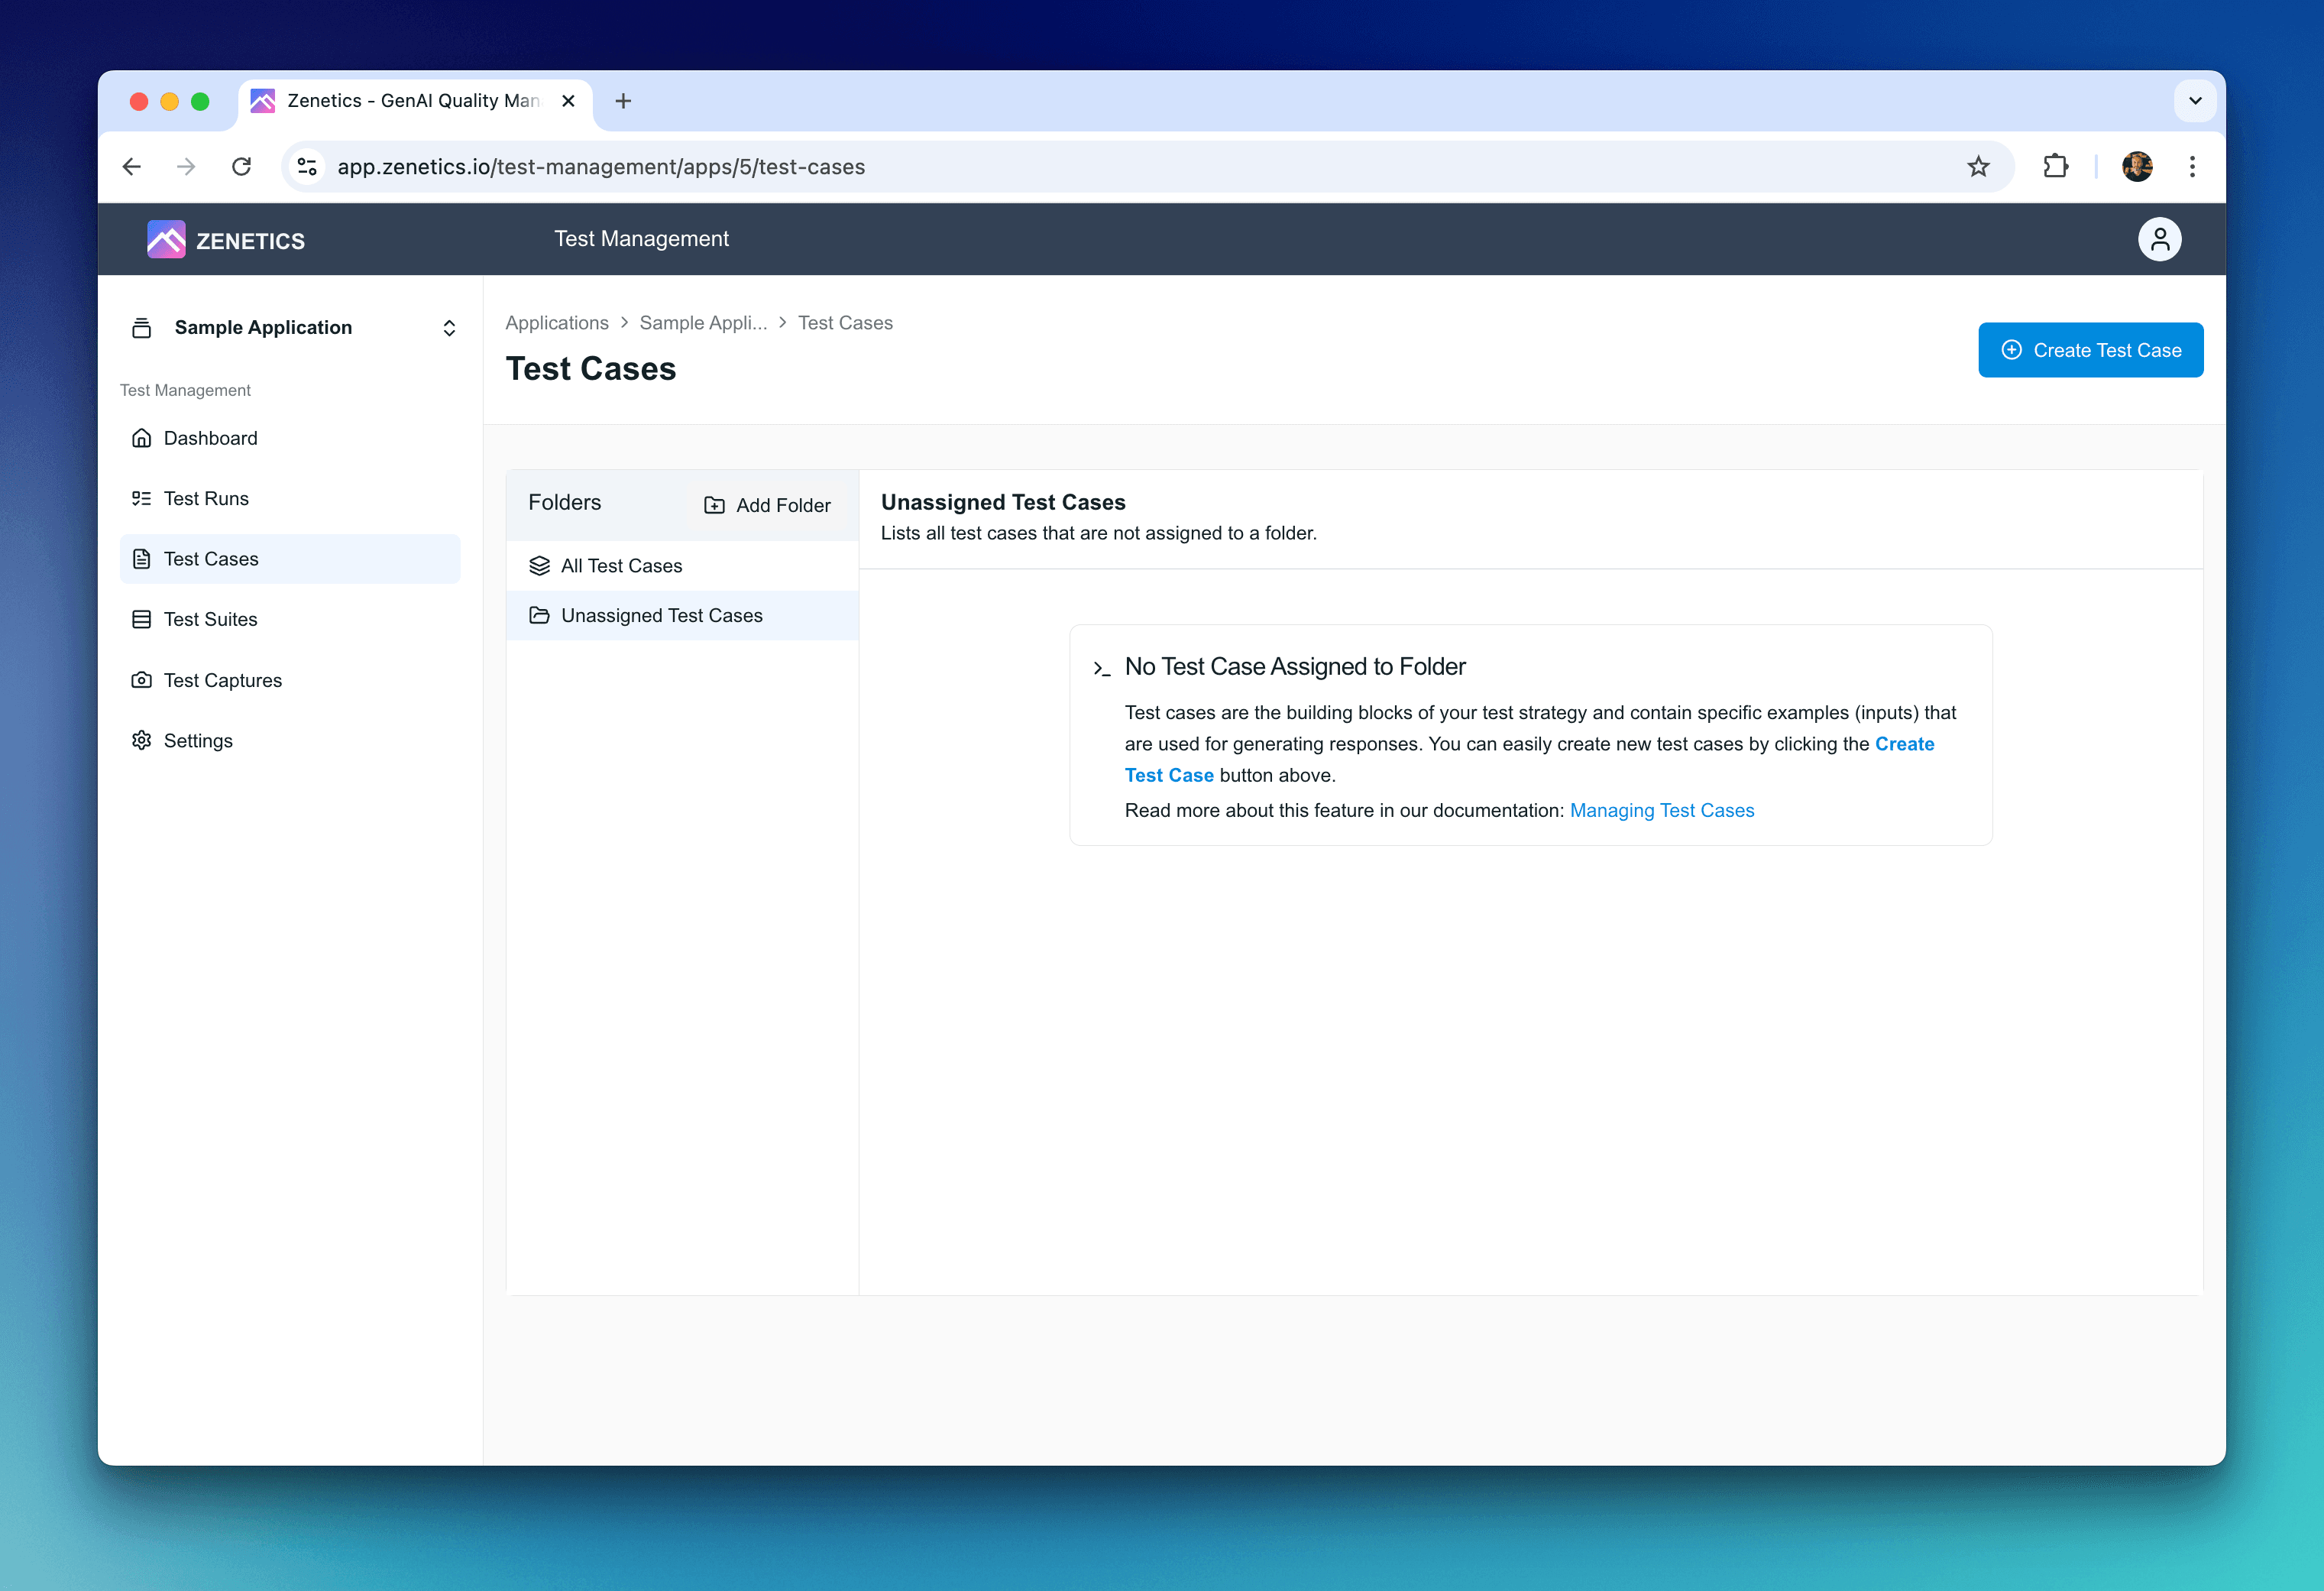
Once you have created an application, you can create a new test case. Test cases are the core of ZENETICS and define the input for your AI applications. To create a new test case, click on the Create Test Case button on the test cases overview page.
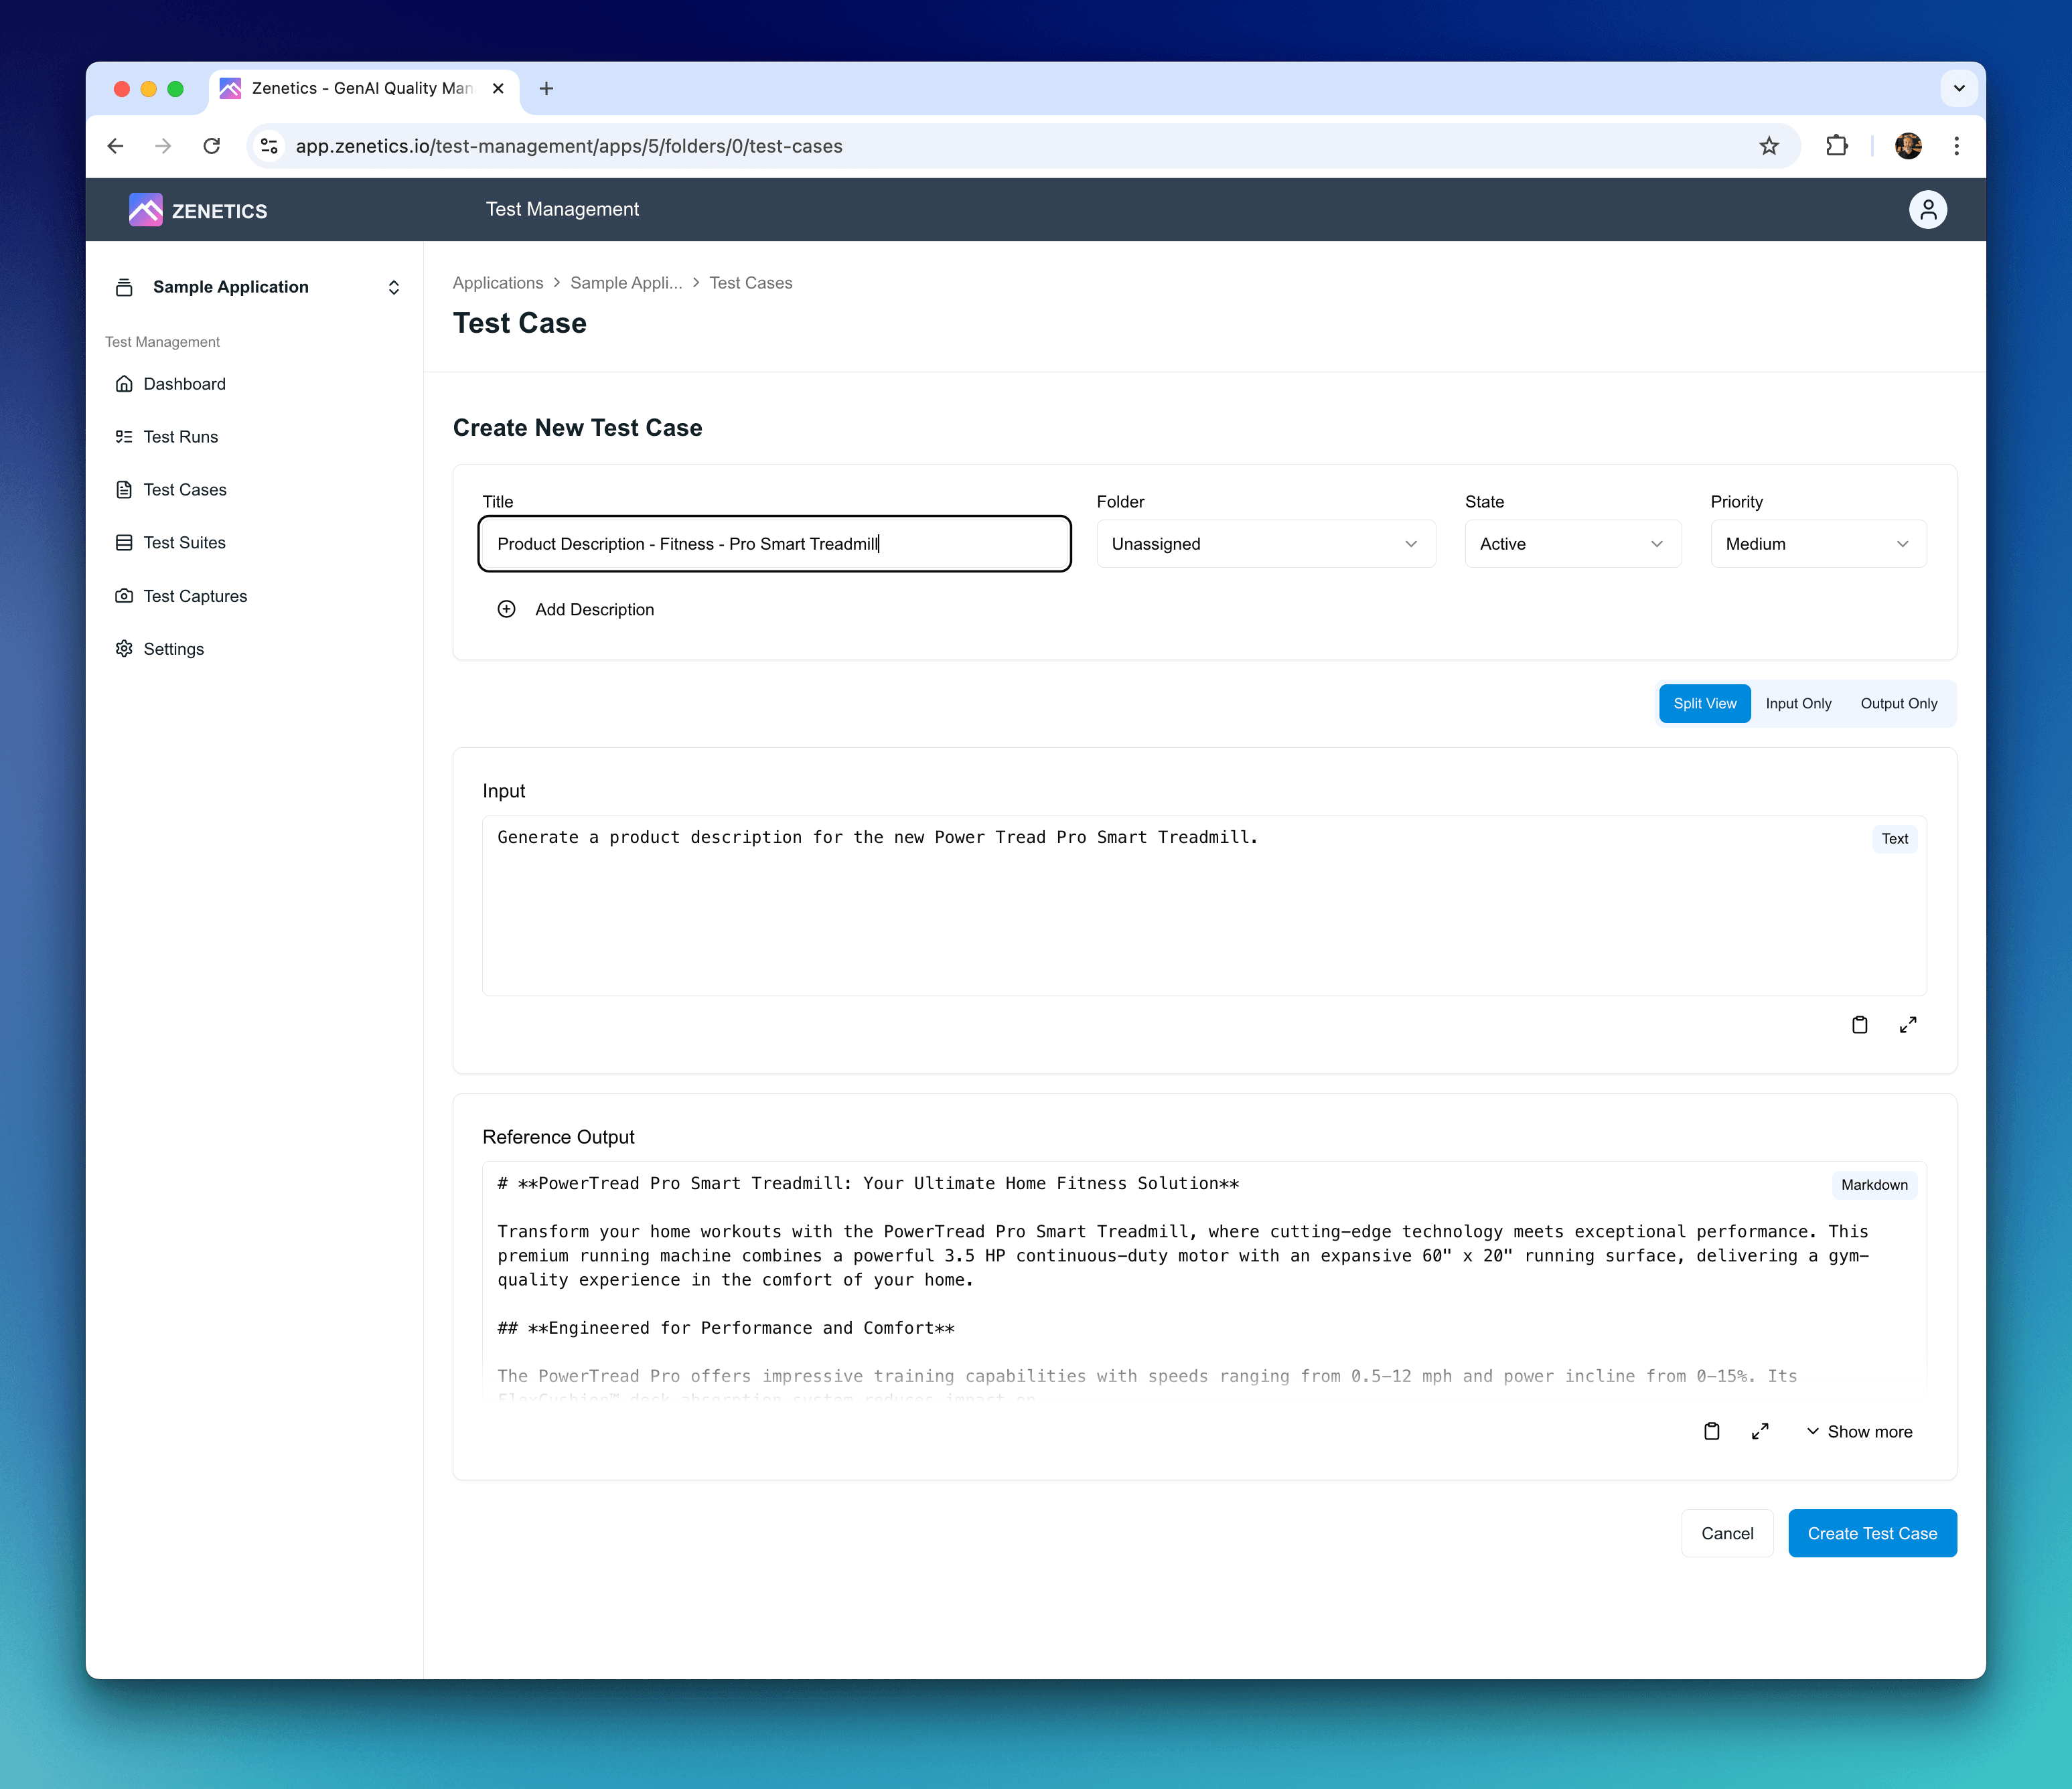
Create your first test case and add an example input. If you have a reference output already available, add this to the Reference Output section in the Test Case dialog.
Enter the following information in the Test Case dialog:
- Title: A descriptive title for your test case.
- Input: The input data (user query) for your AI application.
- Reference Output: The expected output for the given input that is used by evaluators to compare the generated result against this golden record / example. Reference outputs are optional but we recommend to add one for this test cases to see how reference testing works.
ZENETICS lets you group test cases in Folders to keep your test cases organized. You can create a new folder by clicking on the Create Folder button on the test cases overview page. For the first start, you do not need to create a folder and your test cases will be in the special folder Unassigned Test Cases.
Create a Test Suite
To run your newly created test case, you need to create a Test Suite. To create a new Test Suite, click on the Create Test Suite button on the test suites overview page. Once you are done, select the test suite by clicking on the newly created entry in the list.
Test Suites associate your Test Cases with specific Evaluators that analyze the result generated from your AI application.
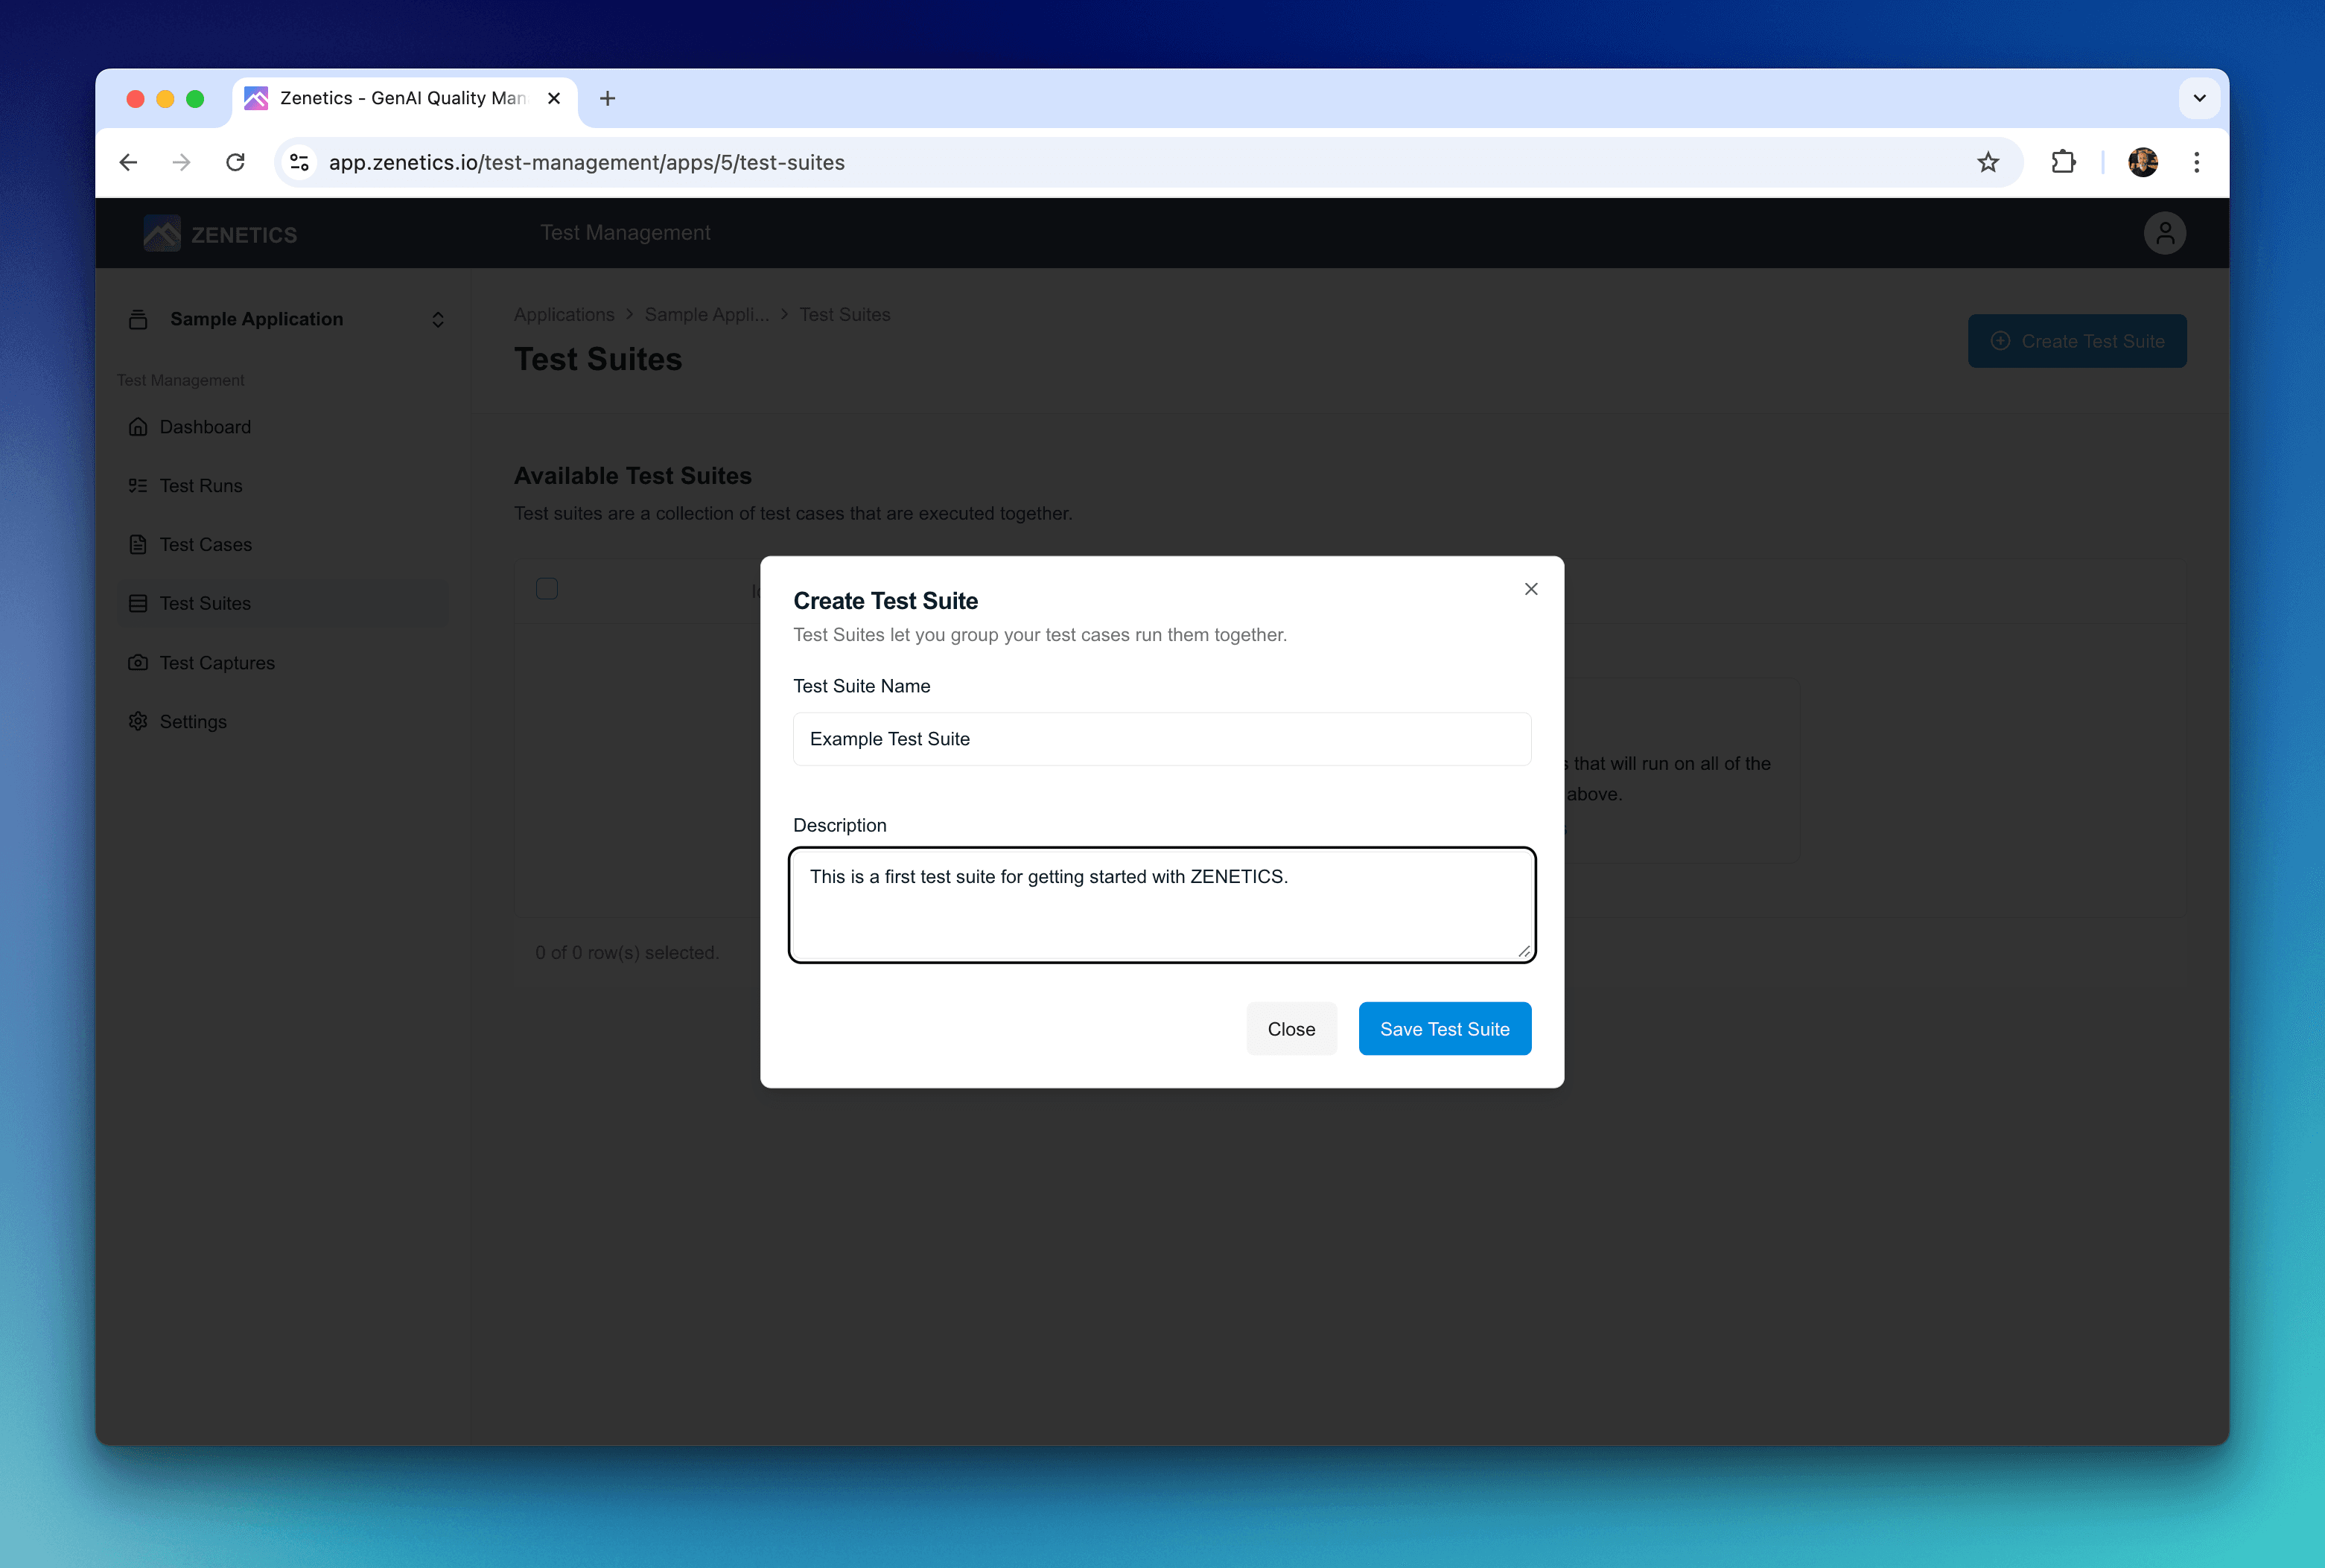
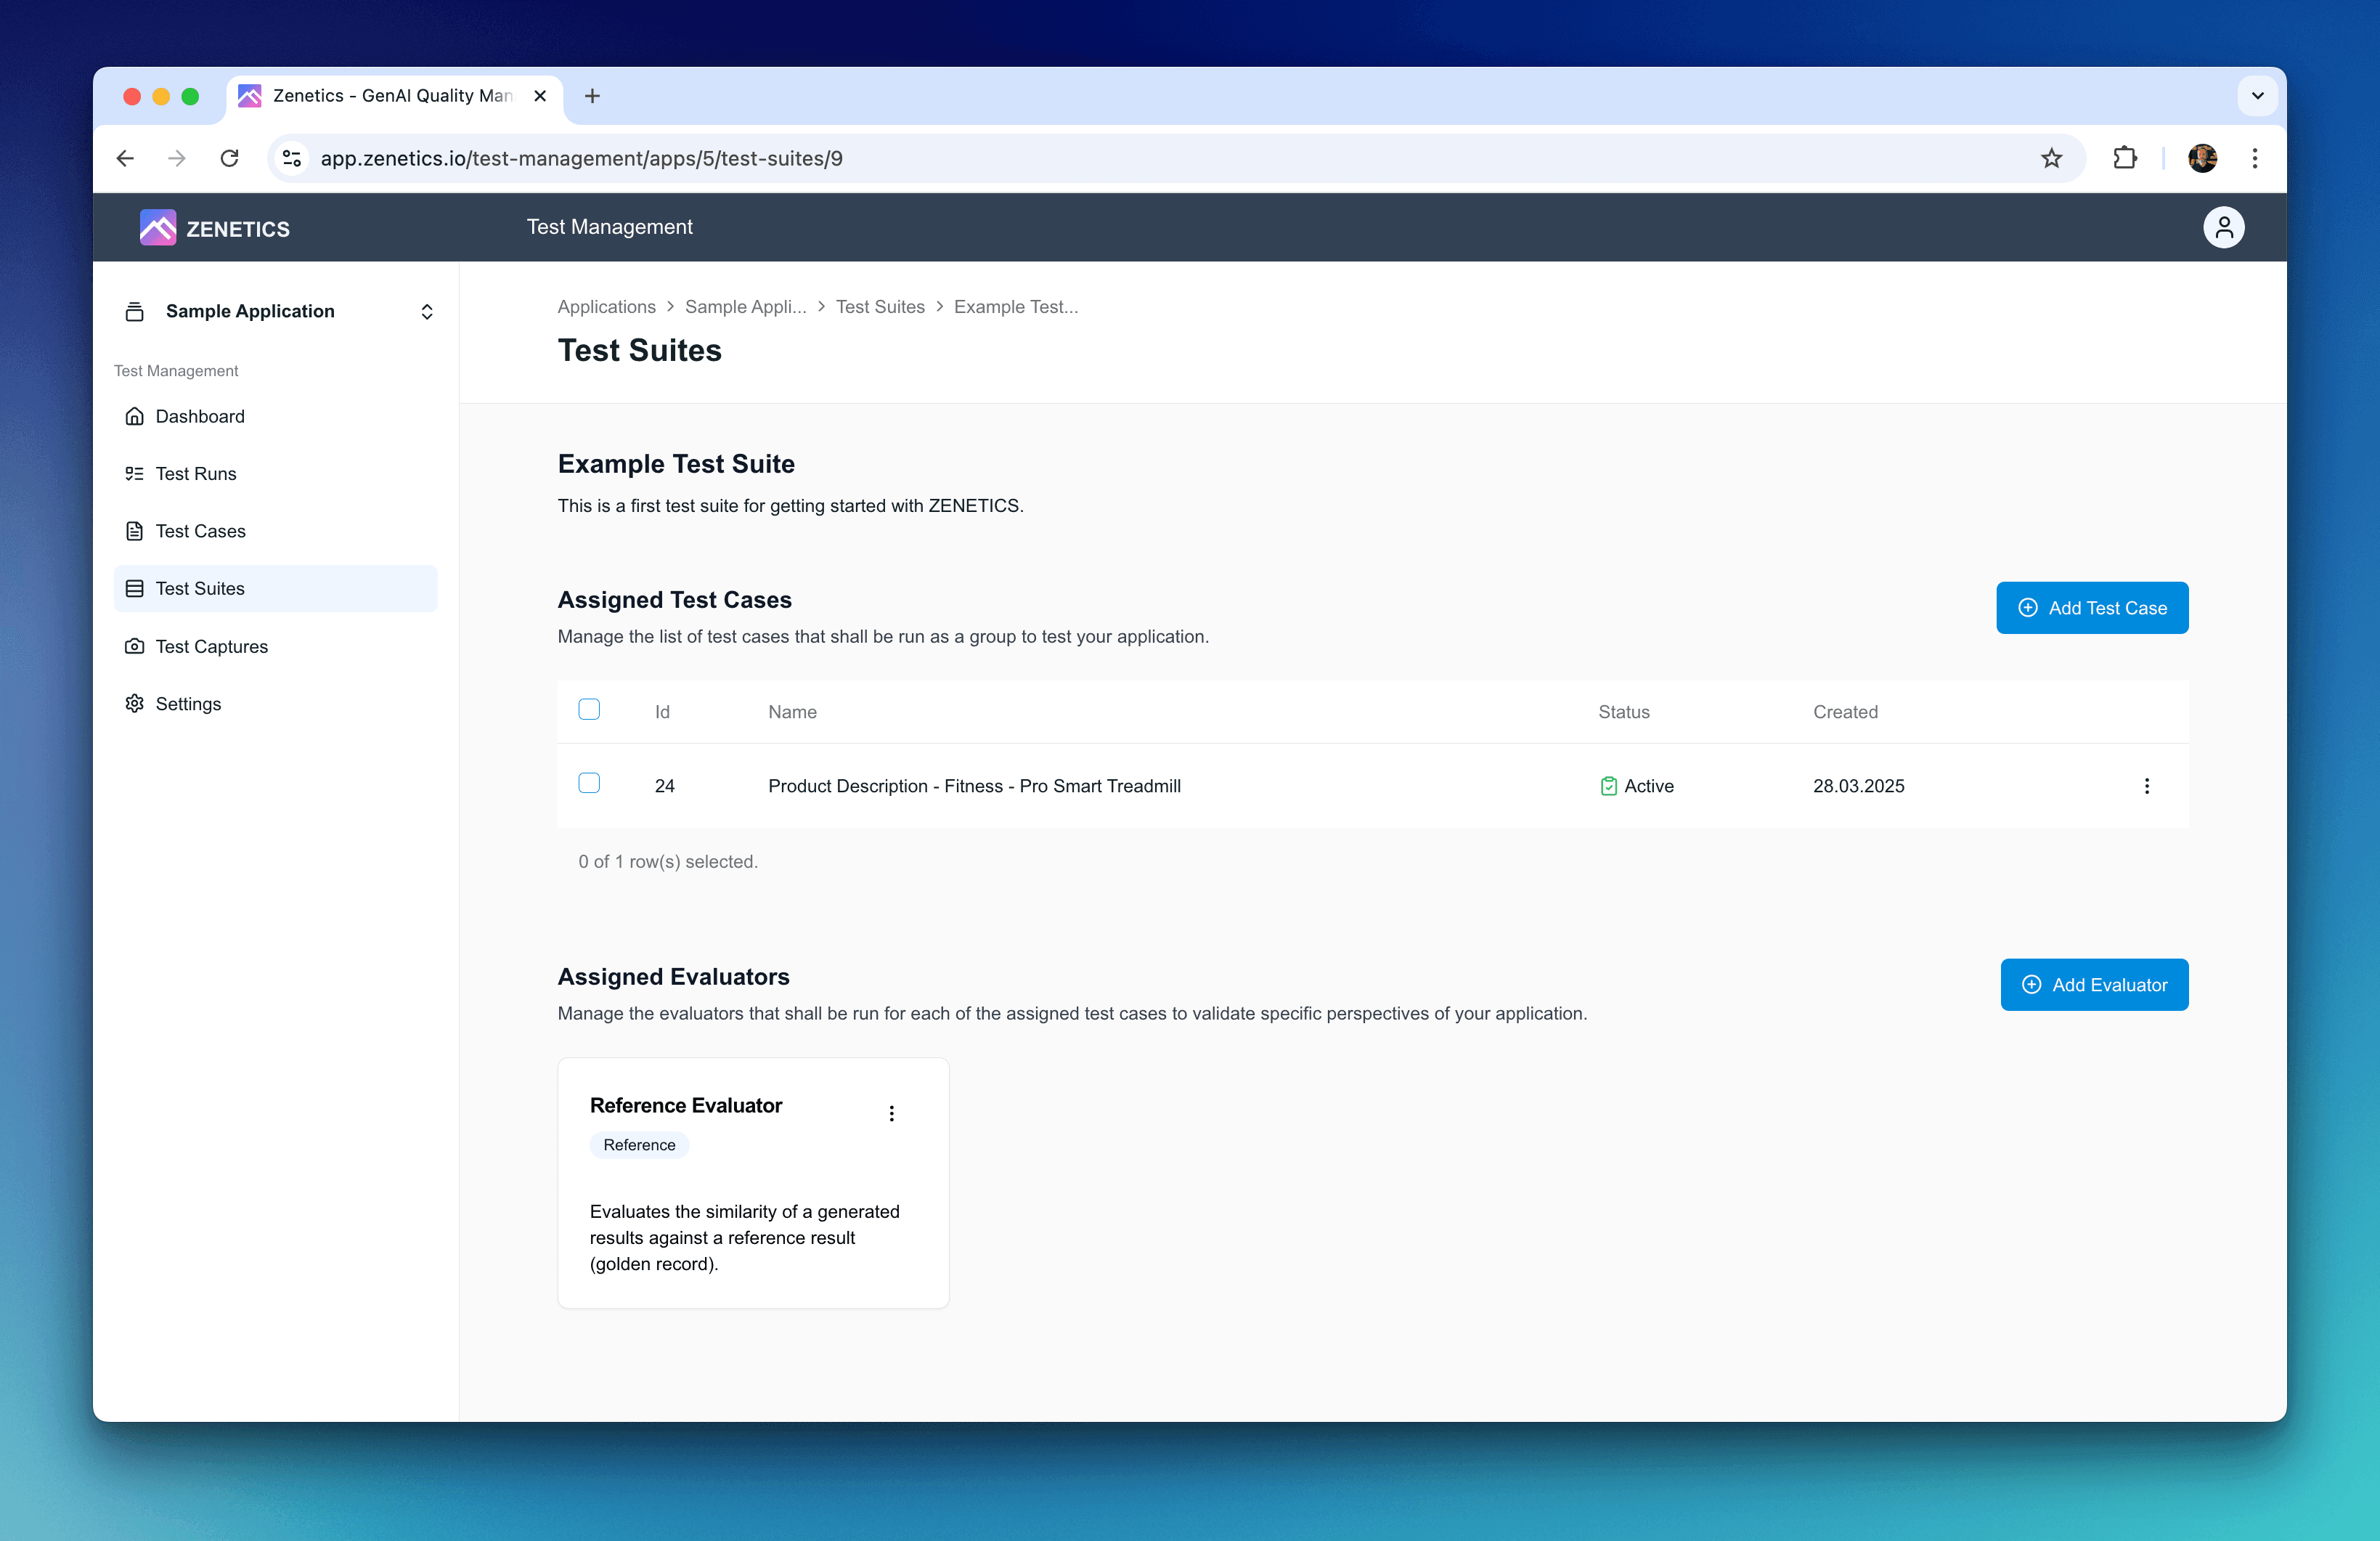
Once you have create the Test Suite, click on the newly created entry in the list of Test Suites. The Test Suite details page lets you assign test cases and evaluators to the test suite.
You will see 2 button on the page: Add Test Cases and Add Evaluators.
Assign a Test Case
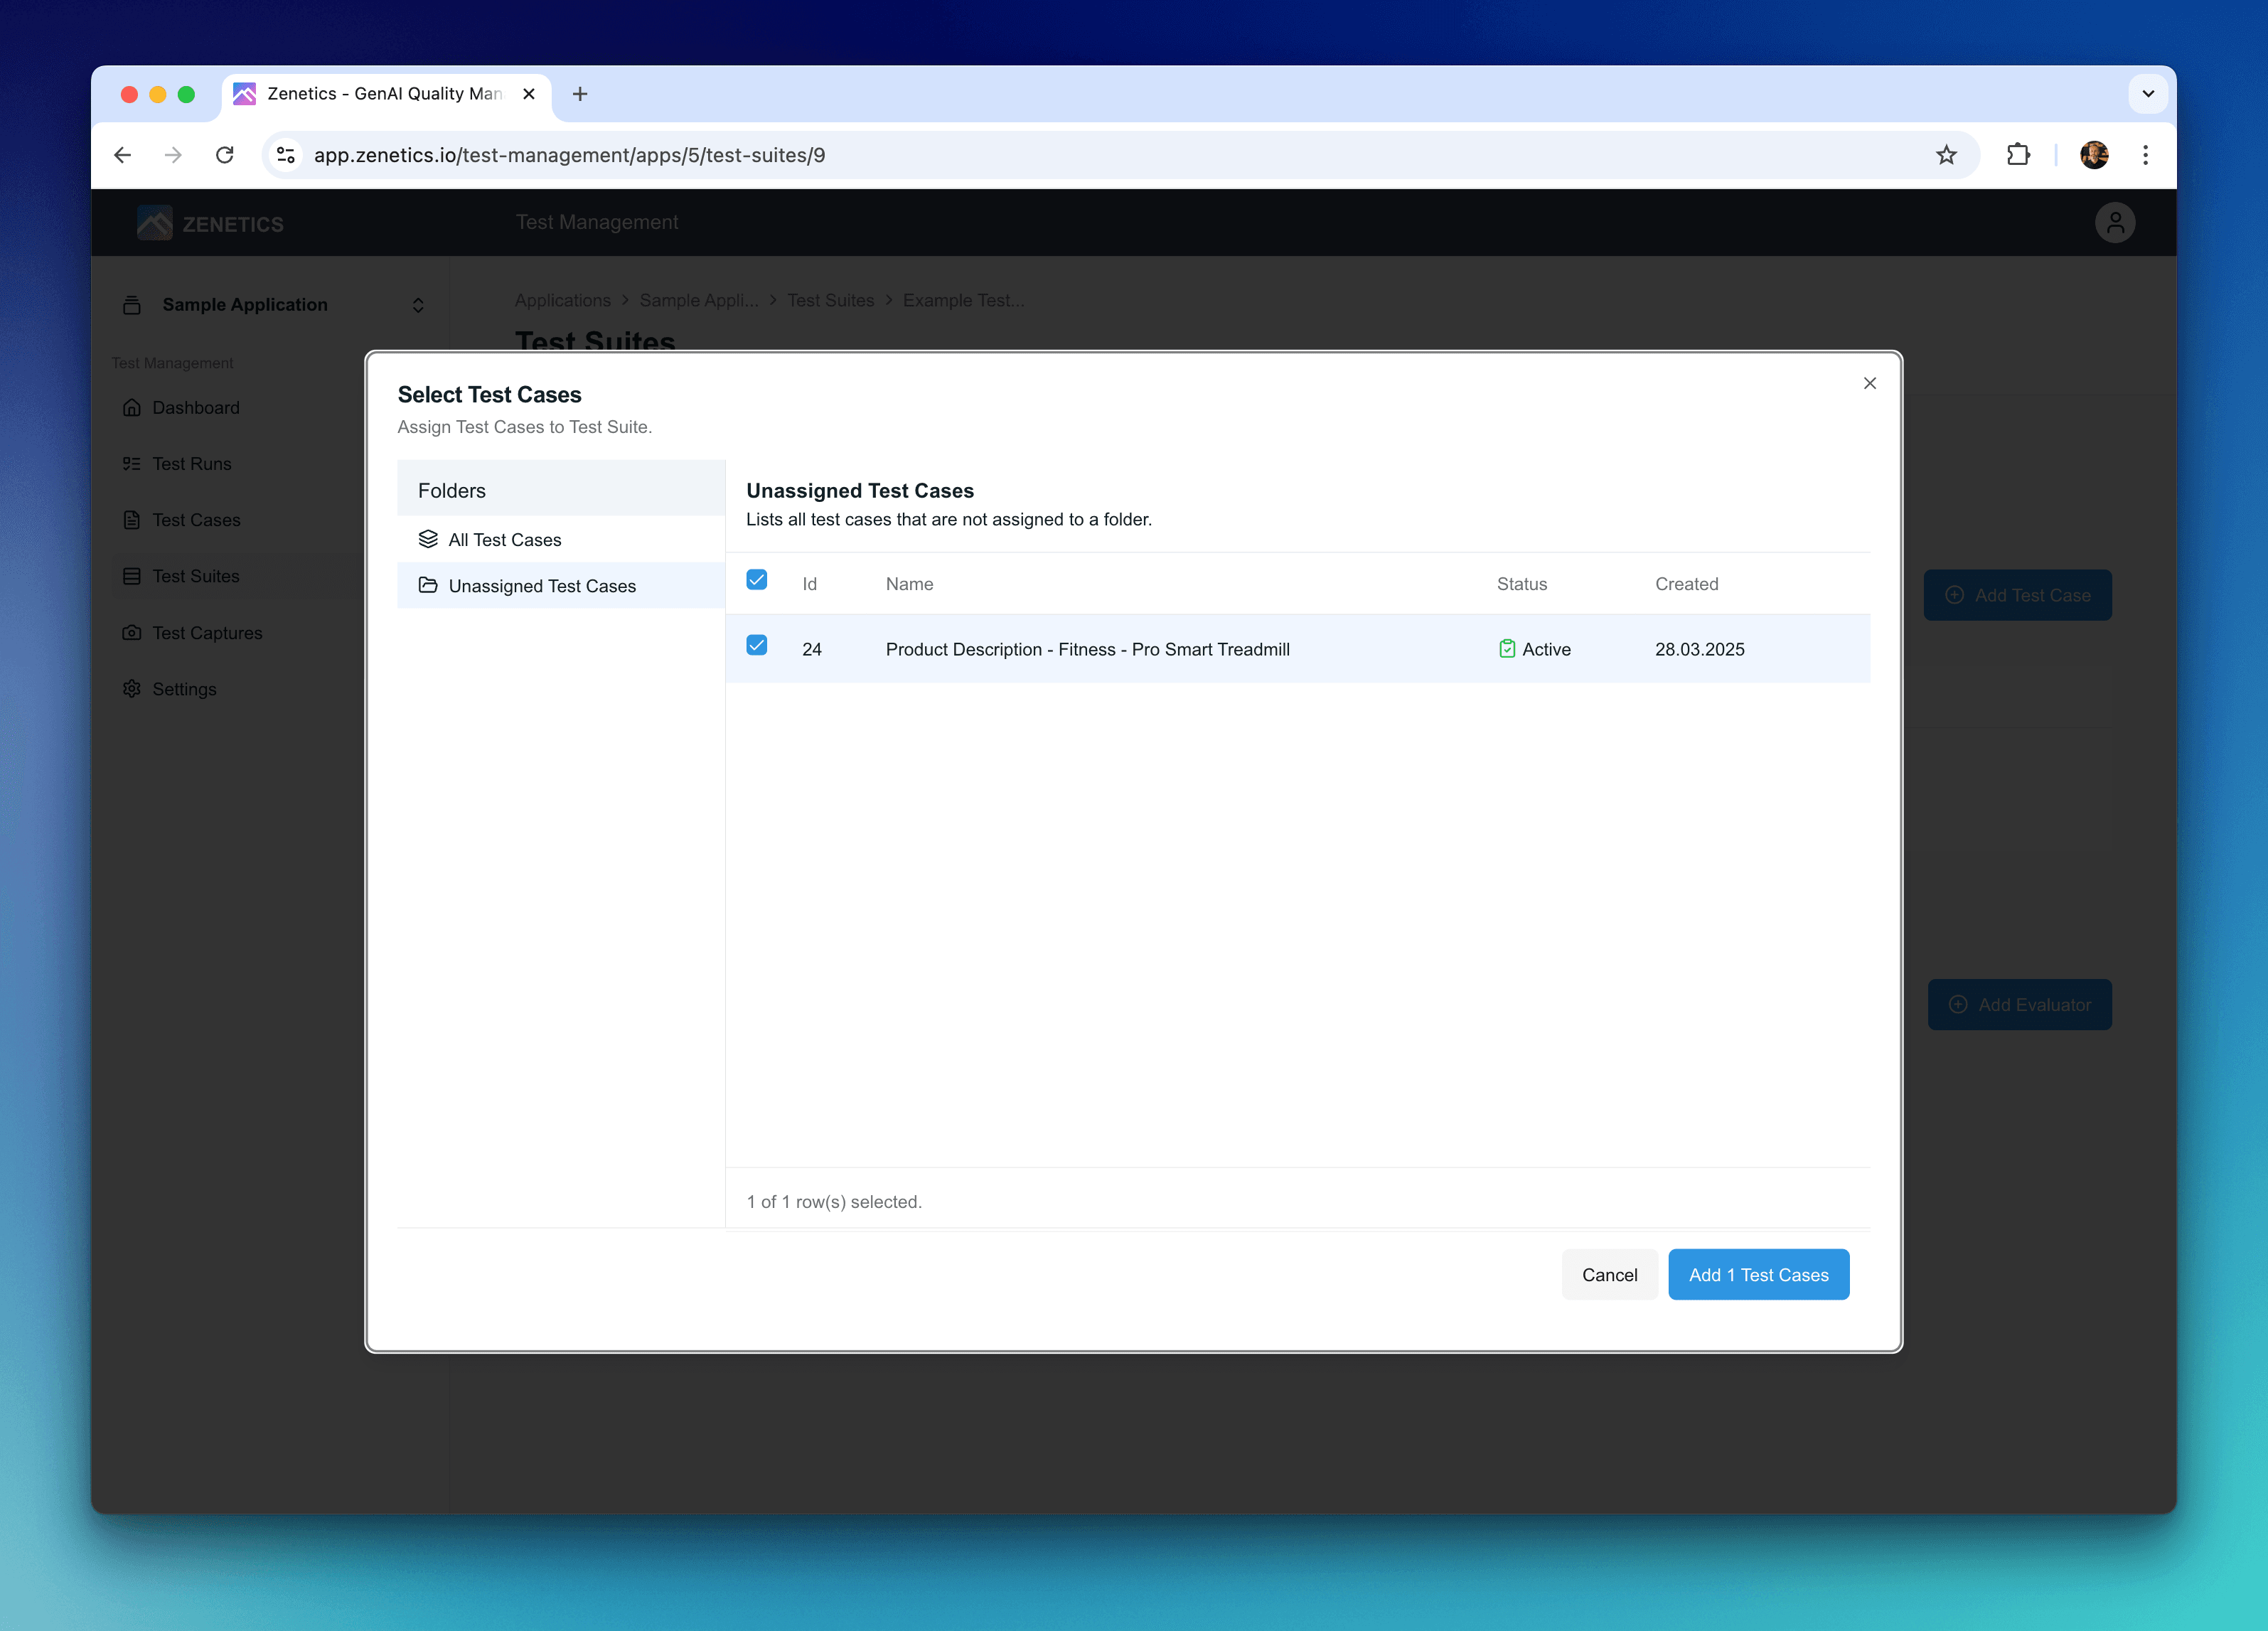
Click on the Add Test Cases button to assign test cases to the test suite. This opens a dialog that let's you select the test cases you want to assign to the test suite. Select All Test Cases to find the test case you created in the previous step.
Click Add 1 Test Case to assign the test case to the test suite.
Assign an Evaluators
Next, let's assign the first evaluator to the test suite. The button Add Evaluator opens a dialog that let's you select the evaluator you want to assign to the test suite. Select evaluator Reference Evaluator from the list by clicking the button Add Evaluator right next to the evaluator entry.

You Are Ready to Run Your First Test Suite
Great job! You have successfully created your first Test Suite in ZENETICS. You are now ready to run your first test suite with the ZENETICS SDK and evaluate the output generated by your AI application.
Your Test Suite should now look like the following screenshot:
Head over to the ZENETICS SDK QUICKSTART to get started with the ZENETICS SDK and learn how to run your first test suite on your local development environment.
If you run into any issues or have questions, please reach out to our support team at: support@zenetics.io. The Zenetics team is happy to help you with any questions and get you started with your first project.