ZENETICS SDK Quickstart Guide
Get your LLM application tested with ZENETICS in just a few minutes. This guide walks you through the essential steps to install the SDK, configure your environment, and run your first test suite.
What you'll accomplish:
- Install and configure the ZENETICS SDK
- Connect your application through a simple generate function
- Run your first quality test suite
- View detailed results in the ZENETICS Portal
Time required: ~10 minutes
New to ZENETICS? Check out the SDK Overview for detailed explanations of features and capabilities.
Install the ZENETICS SDK
Install the SDK using your preferred Python package manager:
# Using pip
pip install zenetics

# Using Poetry
poetry add zenetics

# Using pipenv
pipenv install zeneticsRequirements: Python 3.8+ is required. The SDK is available on PyPI (opens in a new tab).
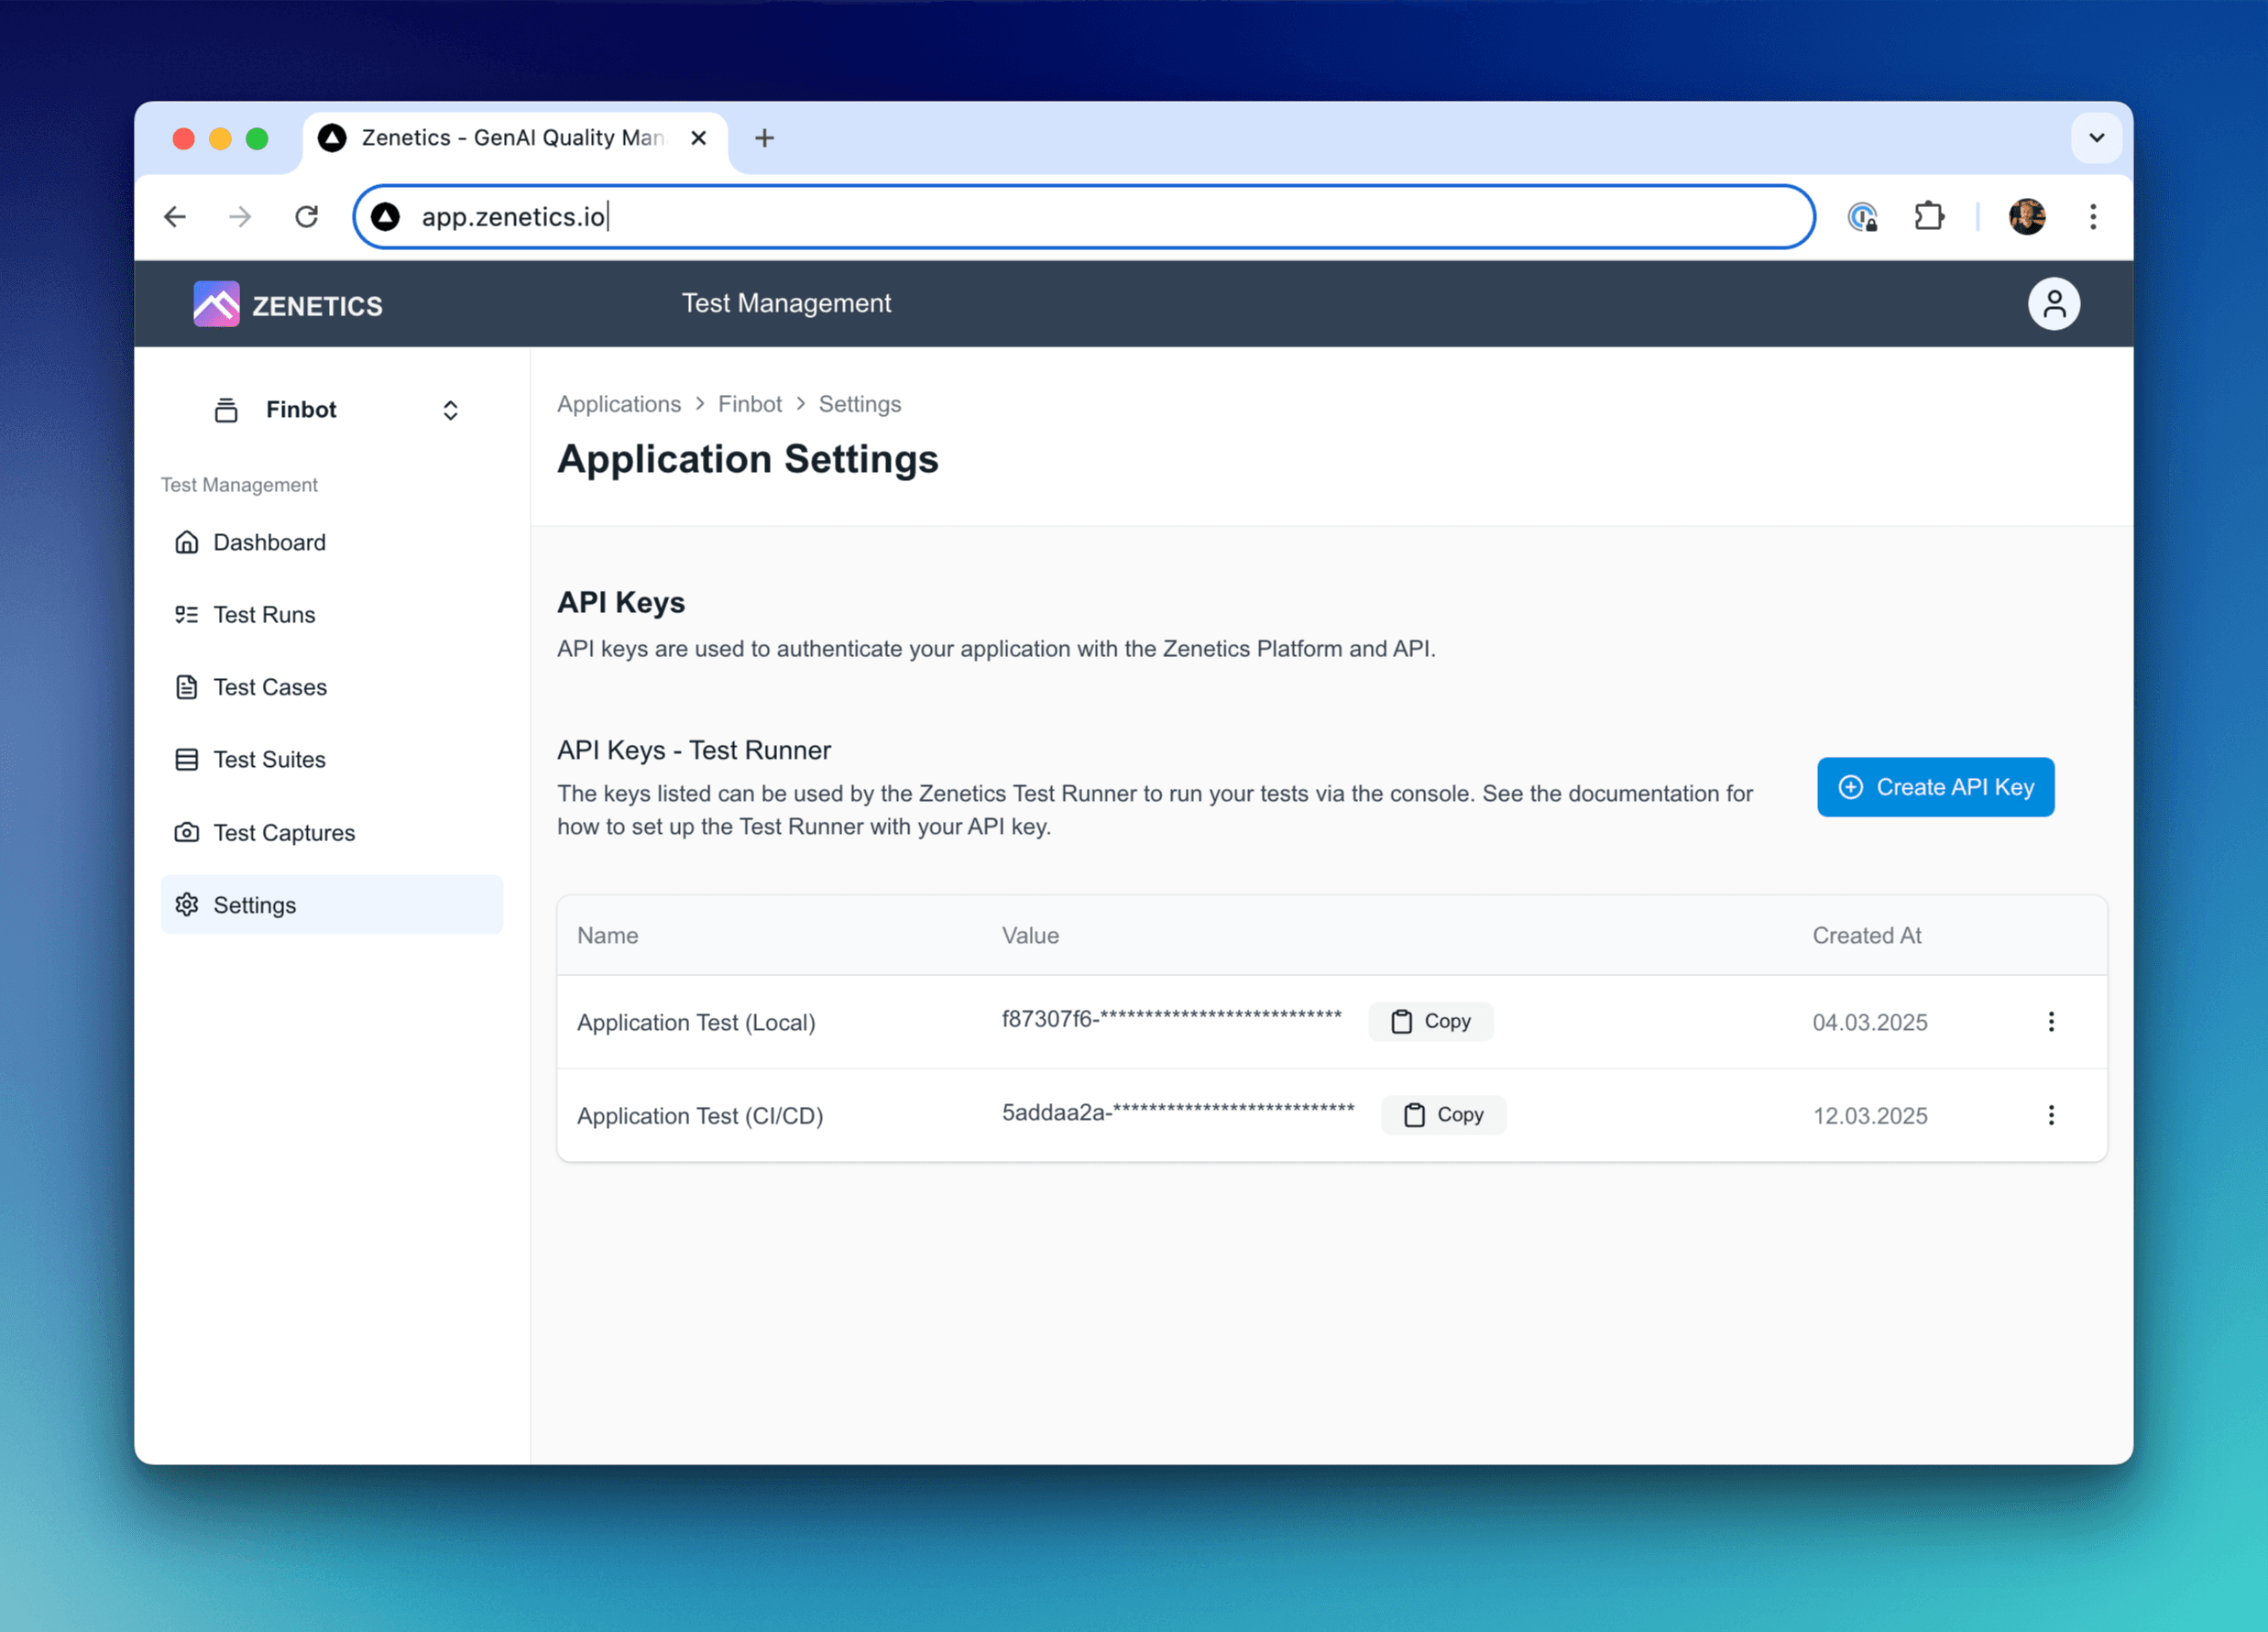
Configure Your API Key
Get your API key from the ZENETICS Portal (opens in a new tab) and configure it using your preferred method:
Option 1: .env File (Recommended)
Create a .env file in your project root:
ZENETICS_API_KEY=your-api-key-hereOption 2: Environment Variable
export ZENETICS_API_KEY=your-api-key-hereGetting Your API Key
- Log in to the ZENETICS Portal (opens in a new tab)
- Select your application
- Navigate to Settings → API Key - Test Runners
- Click Create API Key
Verify Your Setup
Validate your installation and configuration:
# Check configuration
zenetics config show

# Test API connectivity
zenetics check --verbose
You should see your configuration details and a successful connection message.
Troubleshooting: If you see connection errors, verify your API key is correct and check your internet connection.
Create Your Generate Function
Create a Python file that connects ZENETICS to your application. This function receives test inputs and returns your application's outputs.
Example: tests/generate.py
from zenetics.models.generation import Generation, TokenUsage, ModelMetadata

def generate(input: str) -> Generation:
    """
    Connect your LLM application to ZENETICS testing.

    Args:
        input: Test case input from your test suite

    Returns:
        Generation object with results and metadata
    """

    # Replace this with your actual application call
    output, retrieval_context = YOUR_APPLICATION.generate(input)

    # Optional: Include performance metrics
    token_usage = TokenUsage(
        input_tokens=864,
        completion_tokens=567,
        total_tokens=1431
    )

    # Optional: Include model metadata
    metadata = ModelMetadata(
        provider="OpenAI",
        model="gpt-3.5-turbo",
        parameters={
            "max_tokens": 1024,
            "temperature": 0.7
        }
    )

    return Generation(
        output=output,                        # Required: Your app's response
        retrieval_context=retrieval_context,  # For RAG applications
        token_usage=token_usage,              # Performance tracking
        metadata=metadata                     # Model configuration
    )
Integration Options:
- Direct Import: Import your application and call it directly
- API Call: Make HTTP requests to your application's API
- Local Testing: Use mock data for initial testing
Need more details? See the Generate Function Guide for comprehensive examples and best practices.
Find Your Test Suite ID
List available test suites for your application:
zenetics testsuite list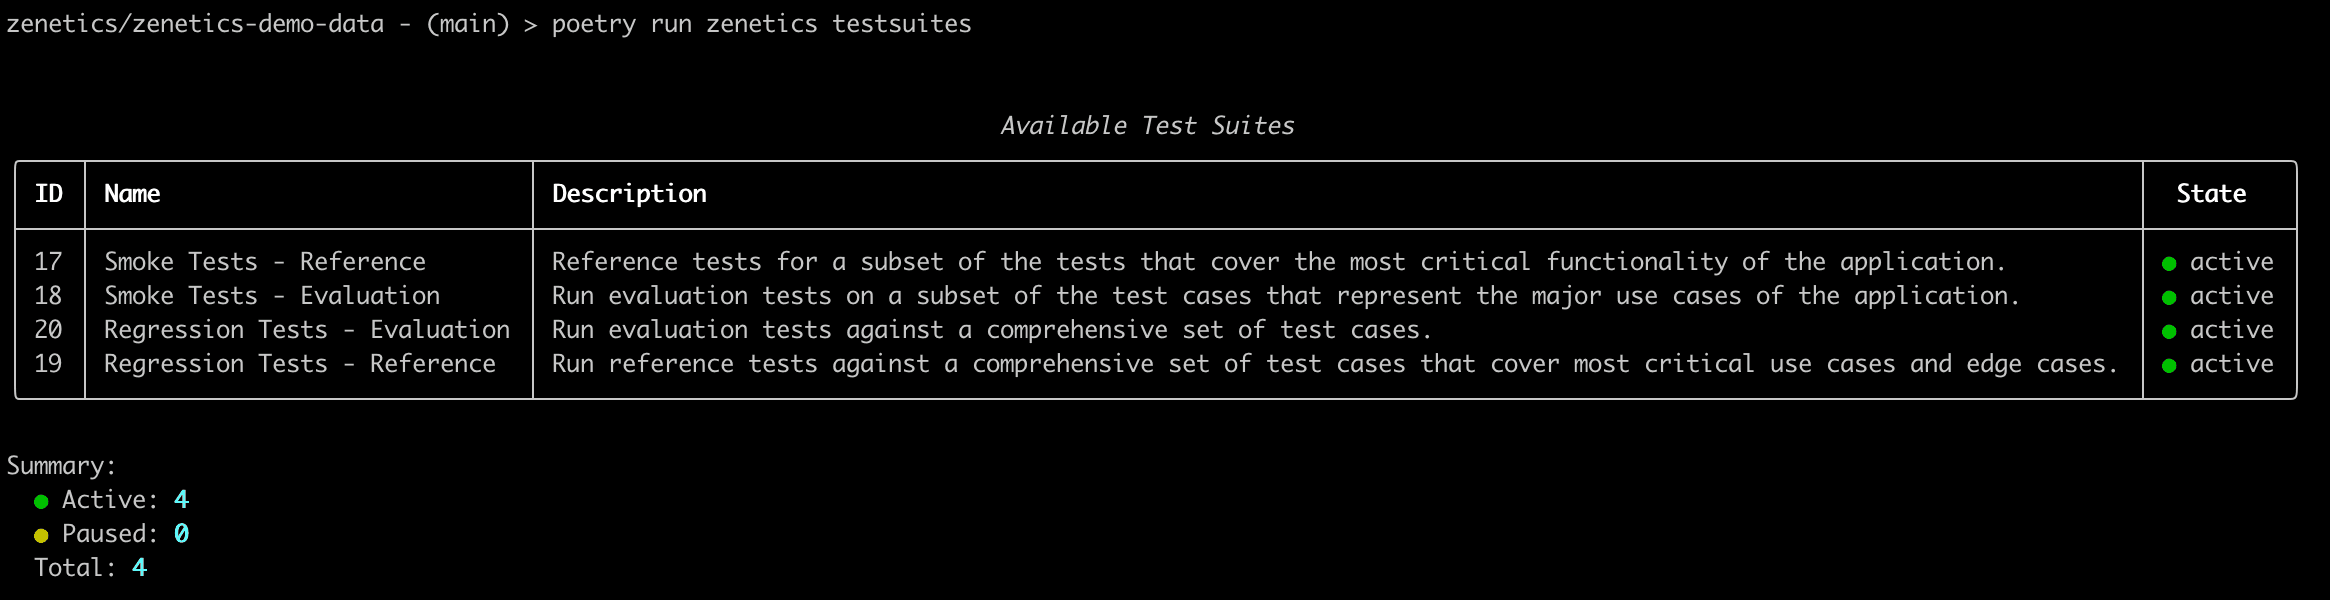
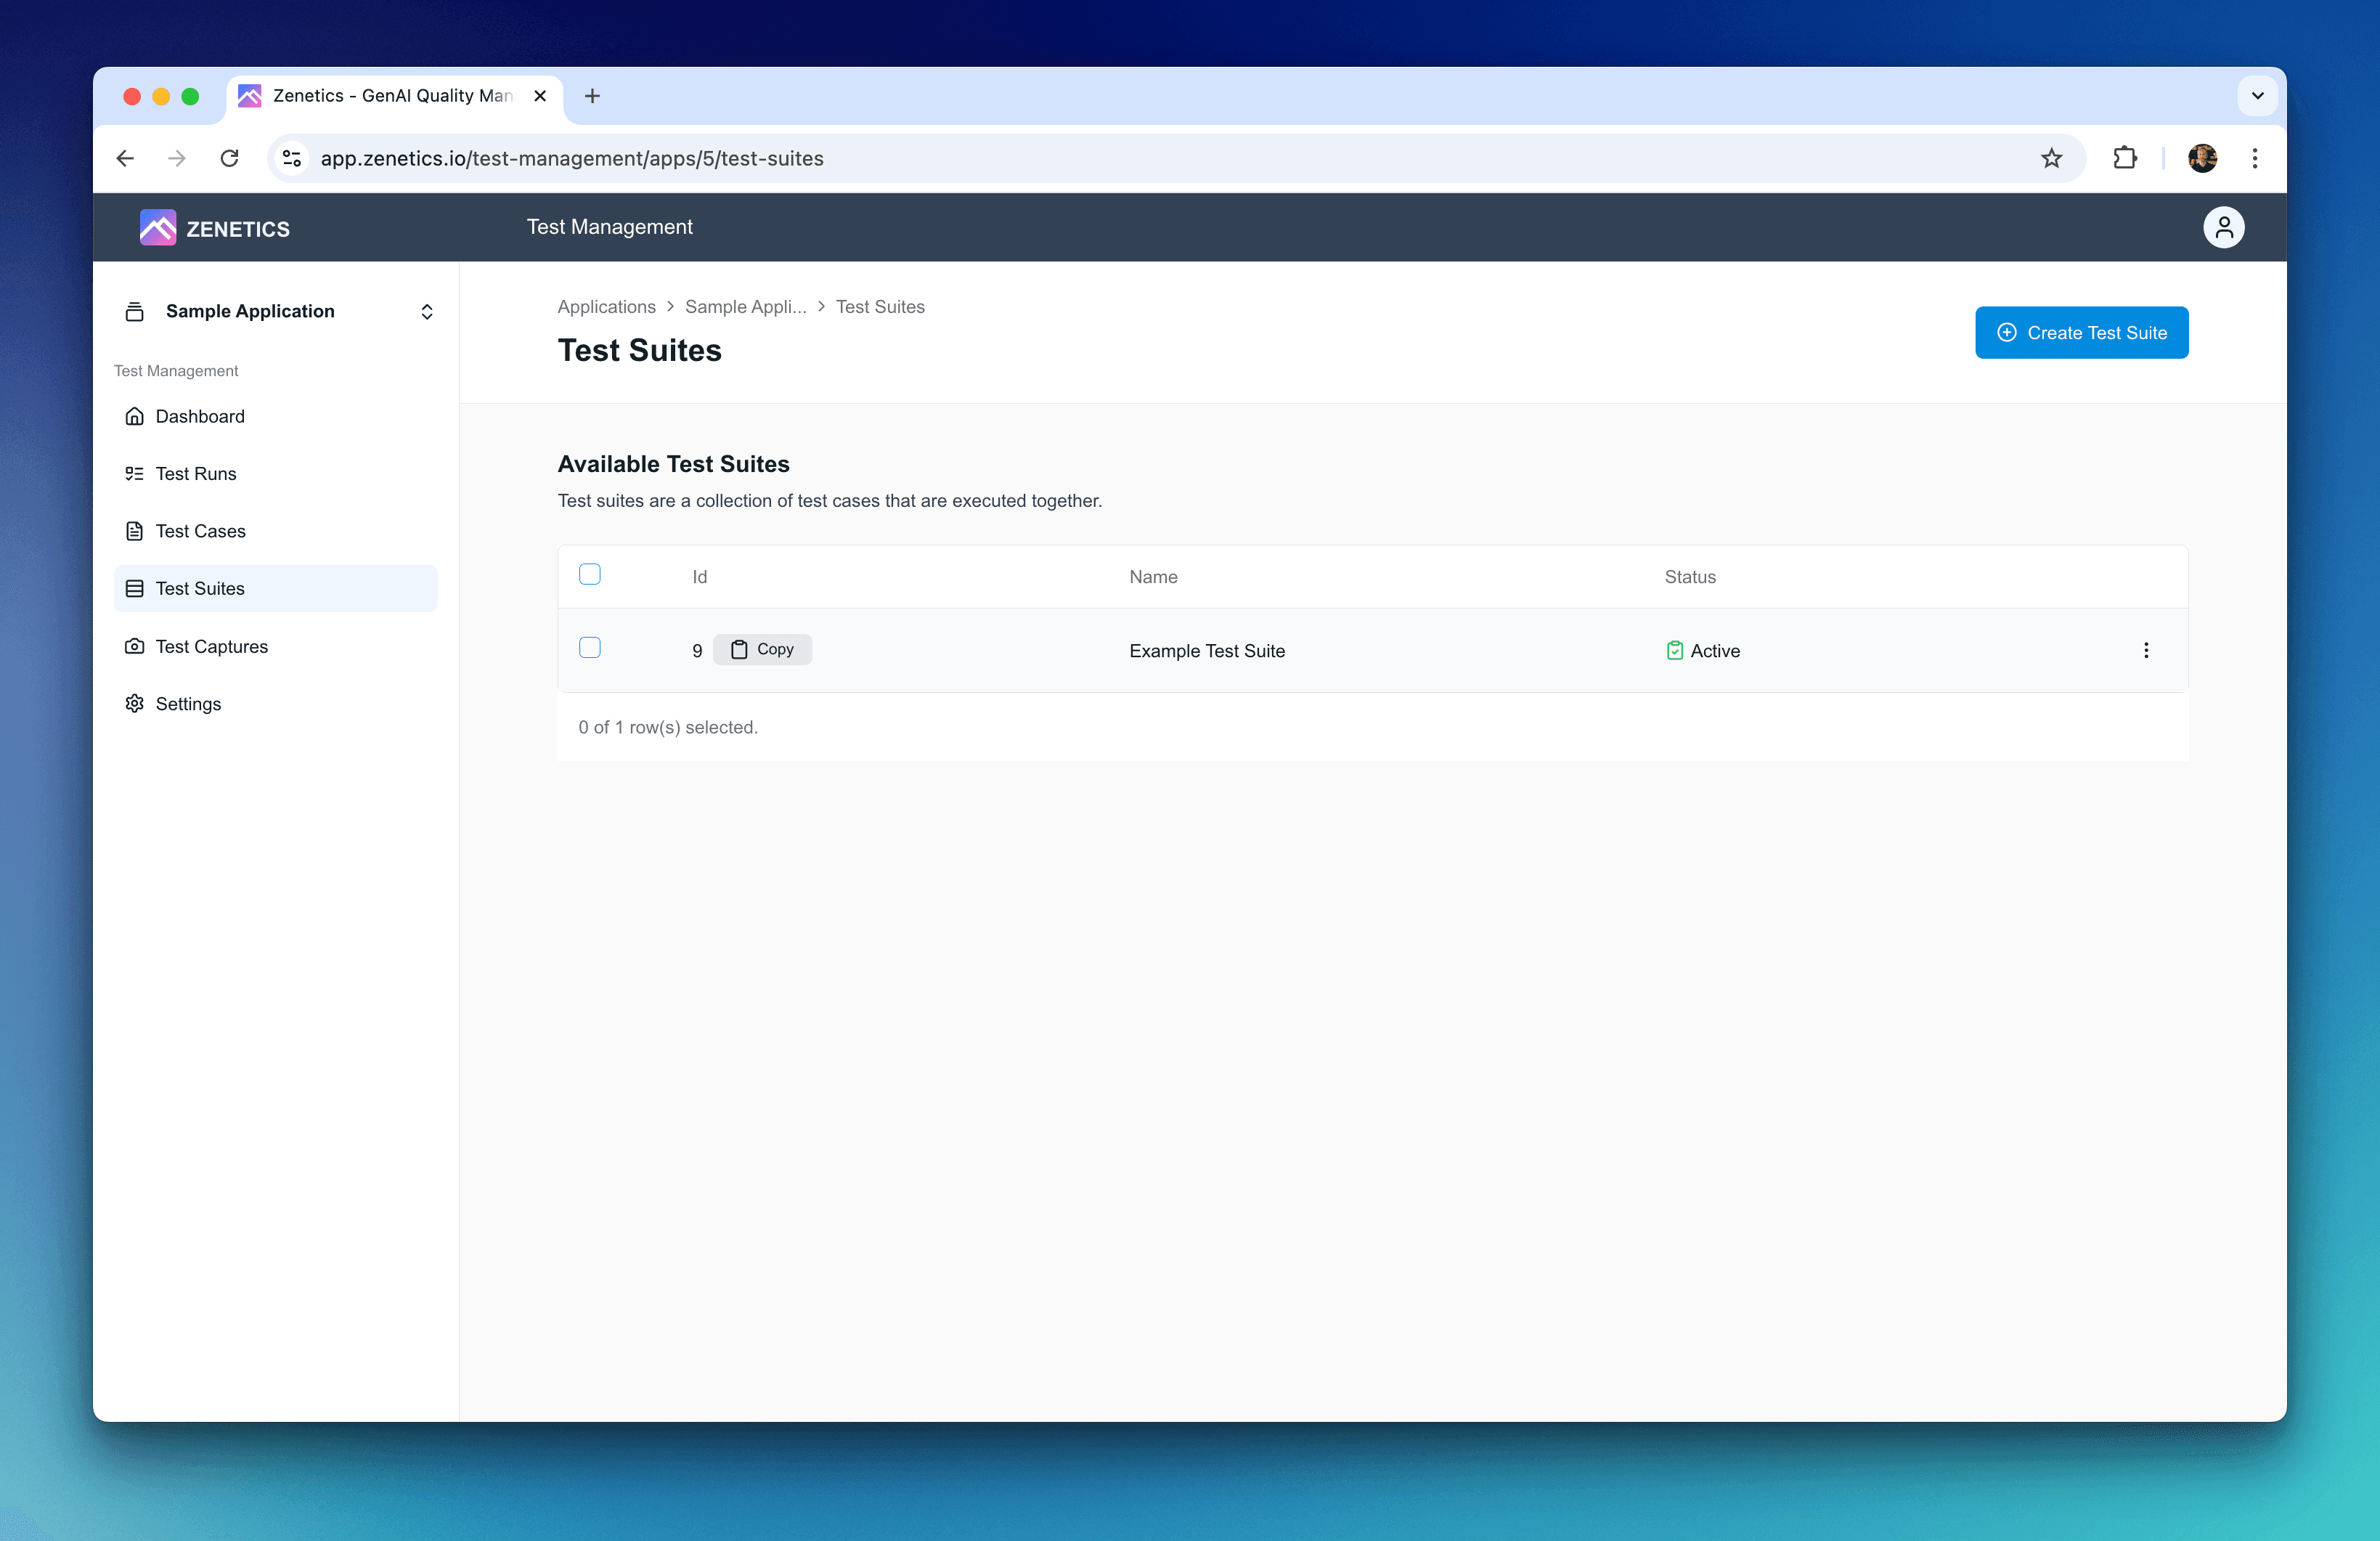
Alternative: Get the ID from the ZENETICS Portal:
- Go to ZENETICS Portal (opens in a new tab)
- Select your application
- Navigate to Test Suites
- Hover over the ID column to copy the test suite ID
Run Your First Test Suite
Execute your test suite using the new CLI syntax:
# Basic usage
zenetics run --test-suite-id 1234 --generator-file tests/generate.py

# Short form
zenetics run -t 1234 -g tests/generate.py

# With verbose output
zenetics run -t 1234 -g tests/generate.py --verbose
Available Options:
--output-dir(-o): Custom results directory--verbose(-v): Detailed test output--local-only: Run without uploading to ZENETICS
Example with options:
zenetics run -t 1234 -g tests/generate.py --verbose --output-dir ./test-resultsThe CLI will show a progress summary and results:
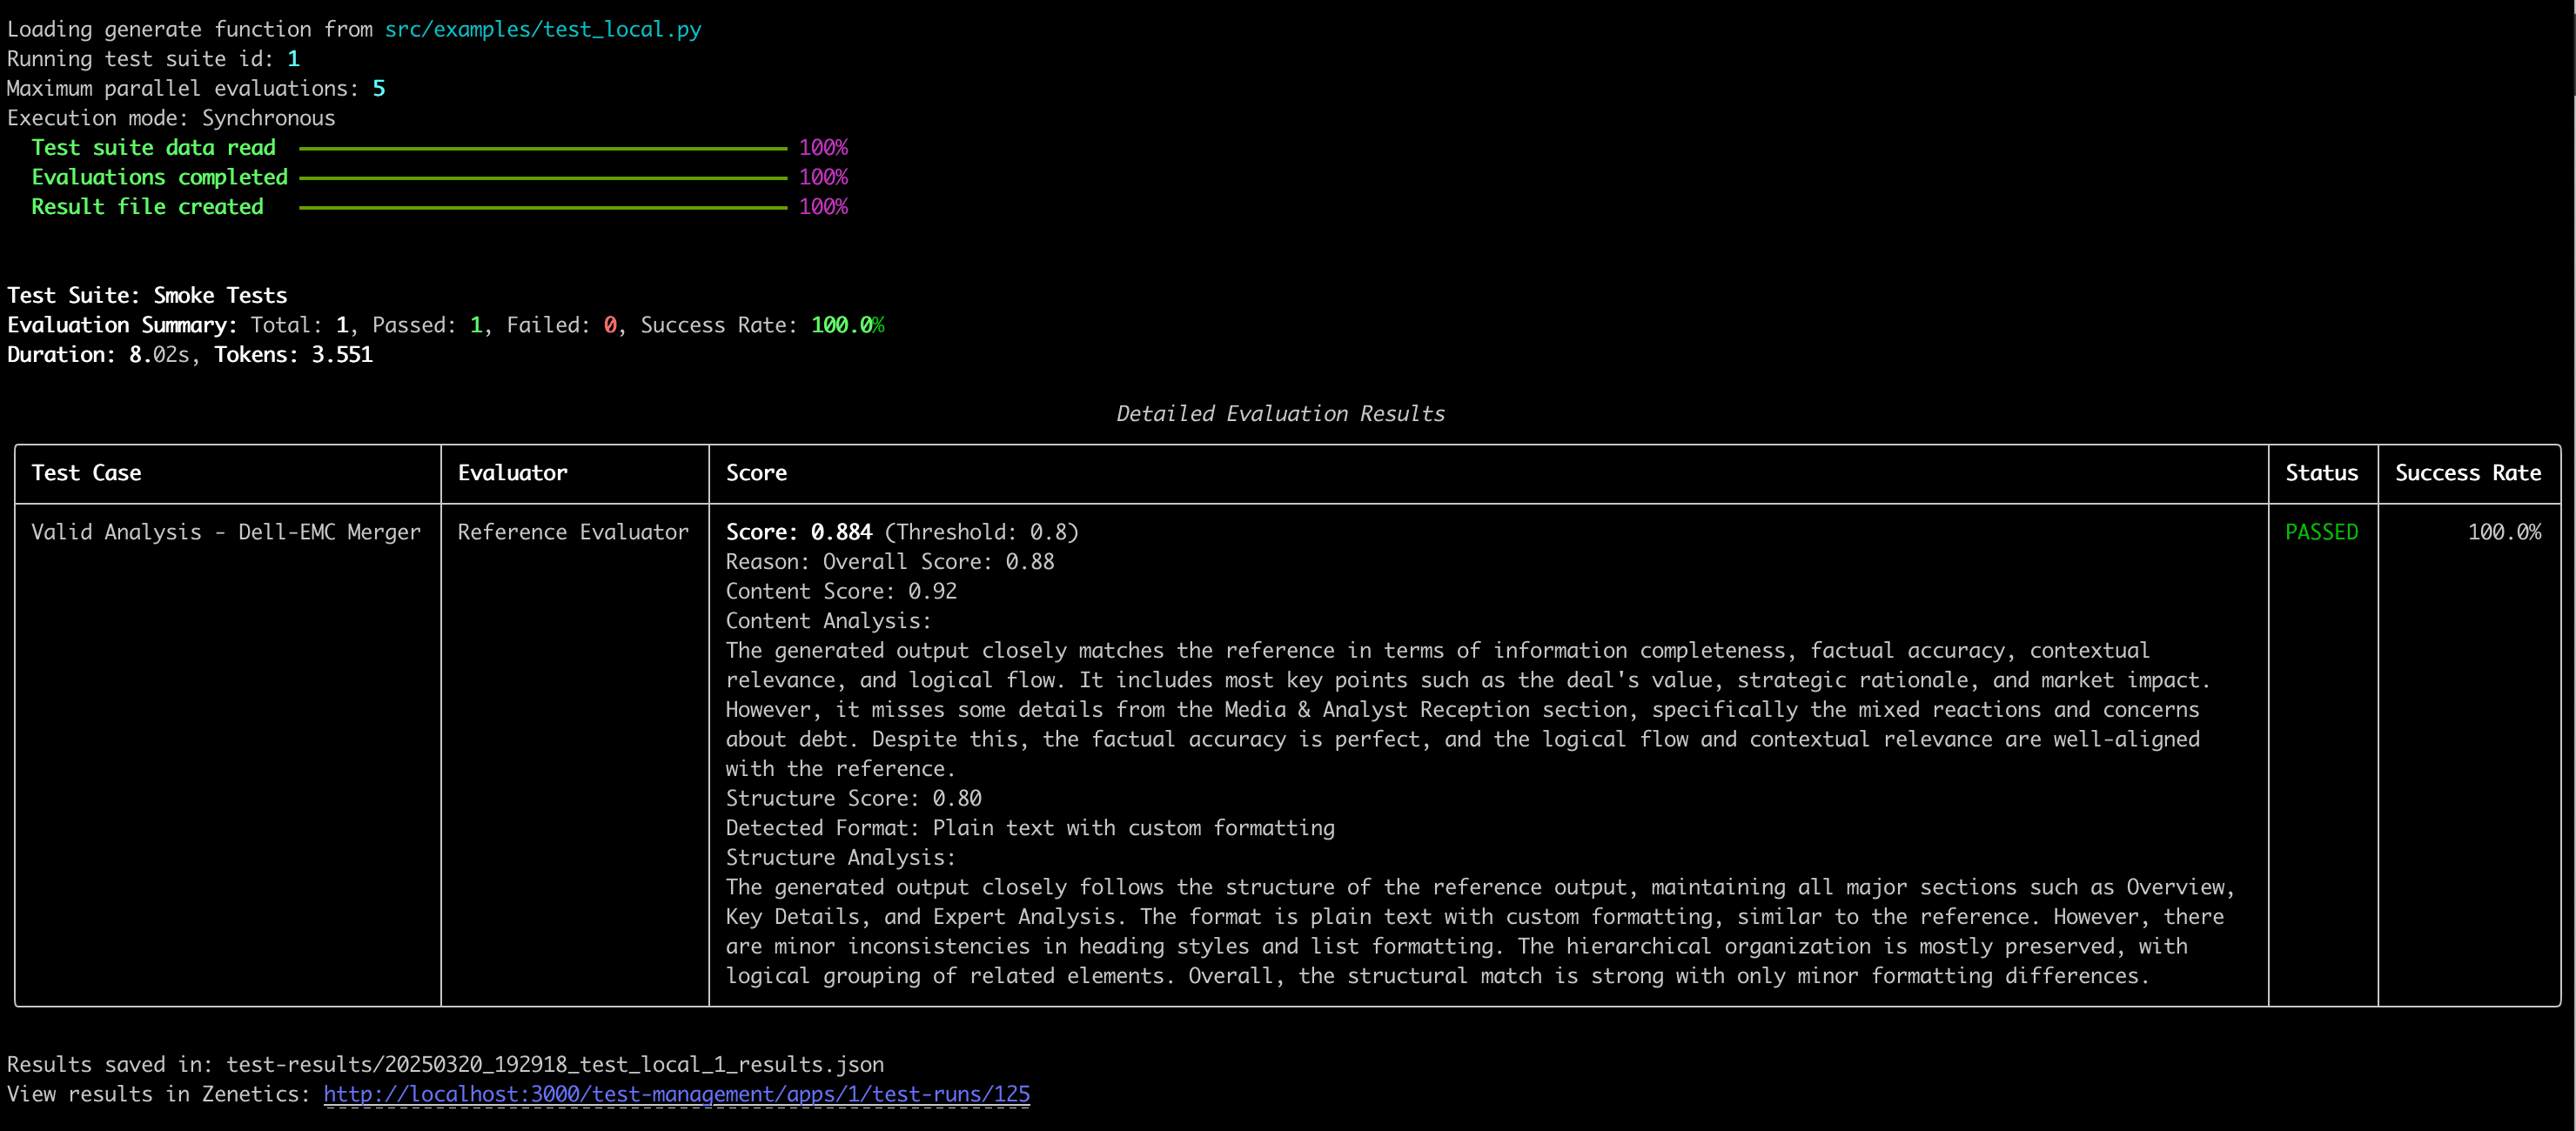
Review Your Results
🎉 Congratulations! You've successfully run your first ZENETICS test suite.
View detailed results:
- Click the ZENETICS URL shown in the CLI output, or
- Visit the Portal: Go to ZENETICS Portal (opens in a new tab) → Your Application → Test Runs
What to explore:
- Individual test case evaluations
- Performance metrics and token usage
- Quality scores and trends
- Detailed evaluation breakdowns
Next Steps
Now that you've run your first test, consider these next steps:
Immediate Actions:
- Explore different test suites for your application
- Customize your generate function with actual application calls
- Set up additional test environments (dev, staging)
Advanced Integration:
Learn More:
- SDK Overview - Comprehensive feature guide
- API Reference - Complete function documentation
- Examples Repository - Real-world implementations
You're all set! You've successfully integrated ZENETICS testing into your development workflow. Head back to the main quickstart guide to continue your ZENETICS journey.
Need help? Contact our support team at support@zenetics.io. The ZENETICS team is ready to help you succeed with your quality testing goals.
Quick Reference
Essential Commands
# Configuration
zenetics config show                    # View current setup
zenetics check --verbose               # Test connectivity

# Test Management
zenetics testsuite list                # List available test suites

# Running Tests
zenetics run -t <ID> -g <file>         # Basic test run
zenetics run -t <ID> -g <file> -v      # Verbose output
zenetics run -t <ID> -g <file> --local-only  # Local testing only
Minimum Generate Function
from zenetics.models.generation import Generation

def generate(input: str) -> Generation:
    output = YOUR_APPLICATION.generate(input)  # Replace with your app
    return Generation(output=output)